Action Items
Introduction
What are Action Items?
Action items are a powerful feature designed to enhance ticket management and ensure all necessary tasks are completed before a ticket is closed. They provide a structured way to track and manage tasks associated with incidents/requests/recurring tasks, from simple follow-ups to complex troubleshooting steps.
Types of Action Items
- Form-Defined Action Items: These are predefined action items attached to specific ticket types or categories. They provide a consistent framework for handling common tasks.
- Ad-Hoc Action Items: These are created dynamically for individual tickets, allowing flexibility in addressing unique requirements.
- Ad-Hoc and Form-Defined (Combined) Action Items: You can combine form-defined and ad-hoc action items to create a tailored approach for your ticket management needs.
You can designate action items as mandatory to ensure that critical tasks are always completed. This means that agents must check off these items before closing a ticket. This helps prevent incomplete or unresolved tickets.
Benefits of Using Action Items
- Improved Efficiency: By tracking and managing tasks effectively, action items help streamline your ticket resolution process.
- Better Visibility: Action items provide a clear overview of the status of tasks associated with a ticket, making it easier to track progress and identify potential bottlenecks.
- Increased Quality: By ensuring that all necessary steps are completed, action items help to improve the overall quality of your ticket resolutions.
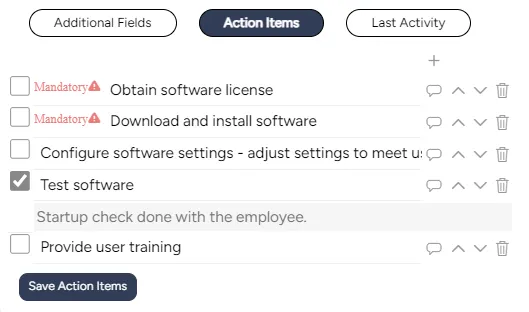
Defining Action Items
Prerequisites for Action Item Implementation
Identify relevant action items by analyzing ticket data, consulting, and gathering inputs from handling teams and their team leaders, and define critical tasks.
Determine action items type: Decide whether action items should be predefined for specific ticket types or categories, or if they should be created dynamically based on individual ticket circumstances. Consider combining pre-defined and dynamic action items to achieve the desired level of flexibility.
Decide what to attach the action items to:
- Ticket Types: Associate action items with specific ticket types. This also includes recurring tasks: Attach action items to recurring tasks to ensure that routine maintenance or follow-up activities are consistently performed.
- Categories: Assign appropriate action items per each category.
- Workflow Tasks: Link action items to specific steps in your workflow processes to guide agents through the resolution process.
Creating Action Items for Categories
Please note: This is not a guide for setting up a new form. For further guidance about setting up a new form, please refer to the full ITCC administrator user guide.
1. Navigate to the Administration --> Forms
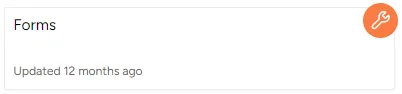
2. Click on the page icon under the “Attributes” column and create a new form if needed first.
3. Choose the appropriate action item type (Form Defined, Form Defined + Case Ad-Hoc, or Case Ad-Hoc) in the “Action Items” field.
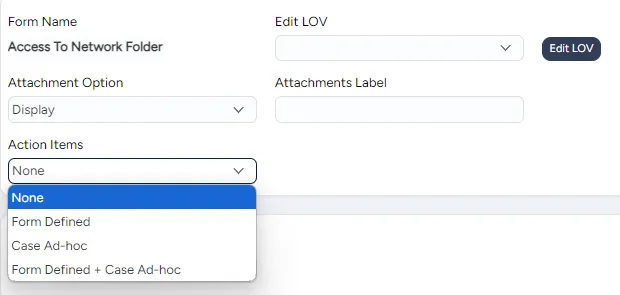
4. For the “Form Defined” / “Form Defined + Case Ad-Hoc” action item type, define action items:
- “Action Items - Show When” field – specify when the action items should appear
- Create (when creating a new ticket)
- Update (when updating an existing ticket)
- Both
- Add Action Items: Click the "Action Items" button to open a pop-up window and define individual action items:

- Action: Enter the text for the action item.
- Mandatory: Indicate if the action item is mandatory.
- Sequence: Arrange the order of action items.
- Delete: Remove unnecessary action items.
- Click "Save" to save the action items and exit the pop-up window.
- Save the form to apply the changes.
5. For the "Case Ad-Hoc" action item type, simply click the save button.
6. Attach the form to the relevant category:
- Navigate to the Administration --> Categories
- Search the relevant category, scroll right to the “Options” column, and click on the + icon
- Select the form name in the “Attach Form” field and save the changes.
Creating Action Items for a Ticket Type
1. Navigate to the Administration --> Setup Call Types
2. Click the page icon below the "Fields" column in the corresponding row of the relevant call type.
3. Choose the appropriate action item type (Form Defined, Form Defined + Case Ad-Hoc, or Case Ad-Hoc) in the “Action Items” field.
4. For the “Form Defined” / “Form Defined + Case Ad-Hoc” action item type, define action items:
- “Action Items - Show When” field – specify when the action items should appear
- Create (when creating a new ticket)
- Update (when updating an existing ticket)
- Both
- Add Action Items: Click the "Action Items" button to open a pop-up window and define individual action items:
- Action: Enter the text for the action item.
- Mandatory: Indicate if the action item is mandatory.
- Sequence: Arrange the order of action items.
- Delete: Remove unnecessary action items.
- Click "Save" to save the action items and exit the pop-up window.
- Save the form to apply the changes.
5. For the "Case Ad-Hoc" action item type, simply click the save button.
Creating Action Items for Workflow Steps
Please note: This is not a workflow user guide. This action item user guide assumes that you already have workflow with defined steps. Please ensure your workflow is prepared. For further guidance about setting up a workflow, please refer to the full ITCC administrator user guide.
1. Navigate to the Administration --> Workflows
2. Enter the relevant workflow, and switch to the Grid Edit view of the workflow.
3. Scroll to the right side of the screen to the "Workflow Steps" section and click the "Action Items" link to open a pop-up window and define individual action items:
- Action: Enter the text for the action item.
- Mandatory: Indicate if the action item is mandatory.
- Sequence: Arrange the order of action items.
- Delete: Remove unnecessary action items.
4. Click "Save" to save the action items and exit the pop-up window.
How To Use?
Locate the "Action Items" section on the ticket creation or edit page.
[Relevant for ad-hoc action items]:
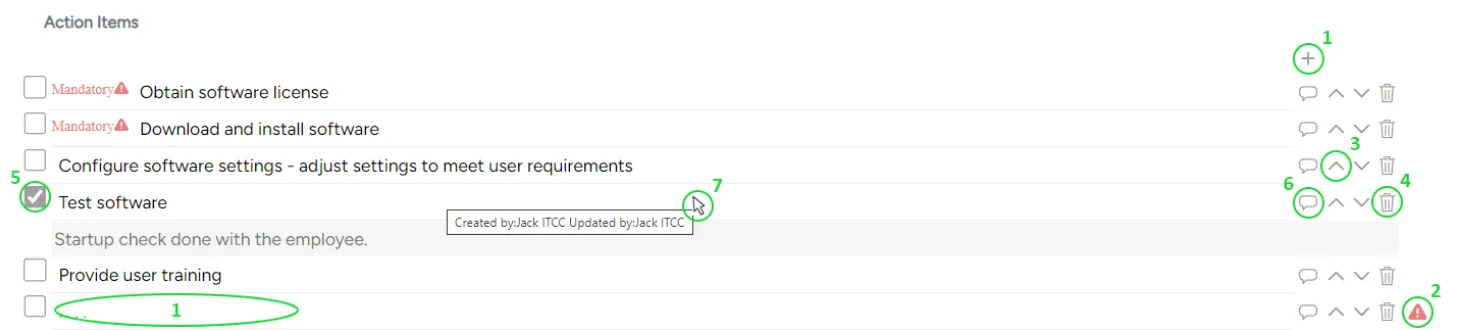
- Add new action items by clicking the plus icon and entering the text. (1)
- Make action items mandatory by clicking the red exclamation mark . (2)
- Arrange the order of action items using the arrow icons. (3)
- Save your changes to apply the new action items.
- Only the creator of an action item can delete it. (4)
[Relevant for all action items]:
- Agents with edit permissions can check off completed action items. (5)
- Agents can also add a comment to an action item. (6)
- To view who created or updated an action item, hover your mouse over it. (7)
- Before closing the ticket, ensure that all mandatory action items are checked as completed.