Attachments
Attachments Overview
Your form can include attachments. Attachments enable users to provide documents required or helpful for the agent or approver to resolve the ticket.
Attachments can be mandatory or optional.
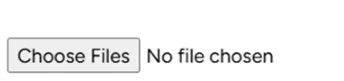
For example, the Employee Travel form includes an optional attachment. The employee can attach the tickets or travel itinerary. For the employee, the attachment option appears as follows:
An example of a required attachment is the New Hardware form, which requires the requester to upload the manager's approval.

The following configurations are available for attachments:
Option | Description |
|---|---|
Display | Enables one or more attachments |
Hide | Disables attachments |
Mandatory | Requires at least one attachment |
Multiple | Enables a structured list of multiple attachments, each with its own specifications |
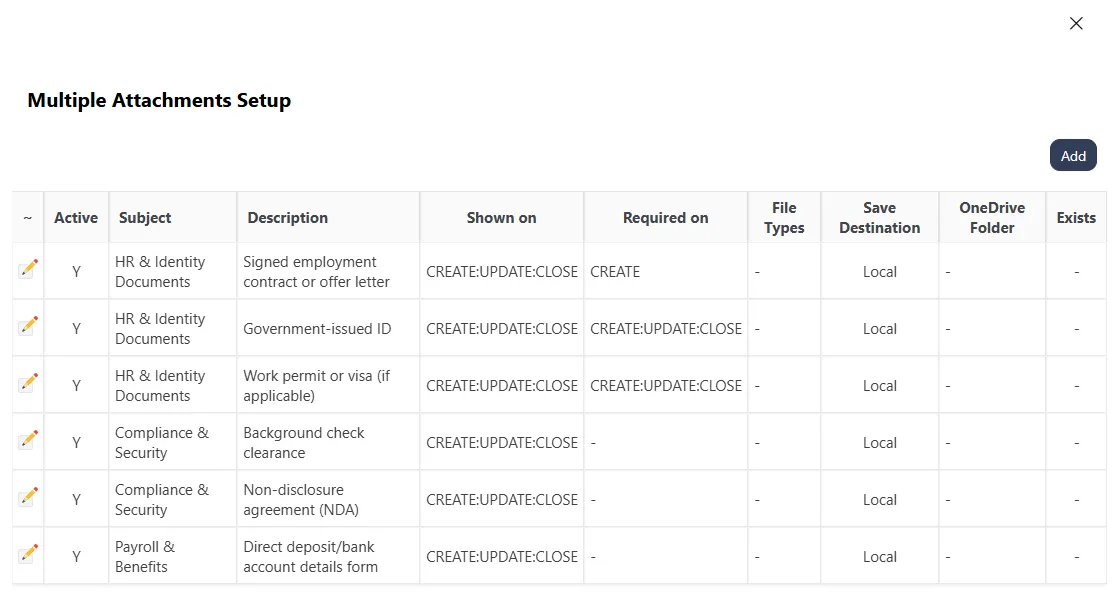
Multiple attachment setup enables you to specify different settings for each attachment. Some attachments can be mandatory and others optional.
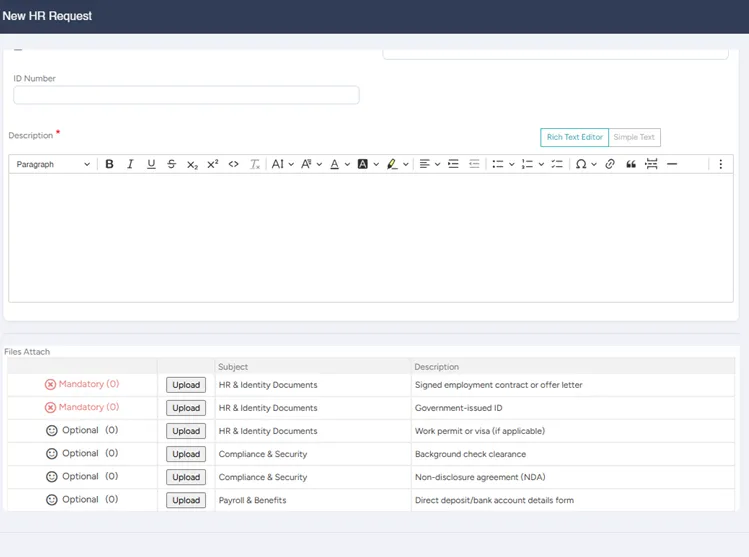
For example, employee onboarding can require the new employee to upload certain documents, such as an ID and a signed contract. Other documents can be optional, only applicable to some new employees, such as a work visa. The following figure is an example of a multiple attachment setup for an Employee Onboarding form.
In a ticket, this multiple attachment setup appears as follows:
Setting up attachments
You can set up attachments at any time.
From the Forms Setup page, you can:
Adding or editing attachments
You can add or edit attachment settings at any time.
To add or edit a form's attachments:
From the tabs at the top, choose Attachments.

From the Attachment Option dropdown list, choose the option you want.
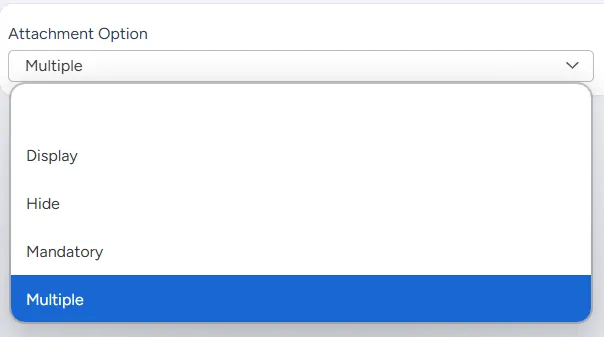
If you chose Multiple, follow the steps for Setting up multiple attachments. Otherwise, in the Attachments Label textbox, enter or edit the attachment label.

At the bottom right of the page, select Save.
Setting up multiple attachments
Any form can have multiple attachments. You can set them up at any time.
To set up multiple attachments:
After selecting Multiple in Attachment Options, at the bottom right of the page, select Save.
Select Multiple Attachments Setup.

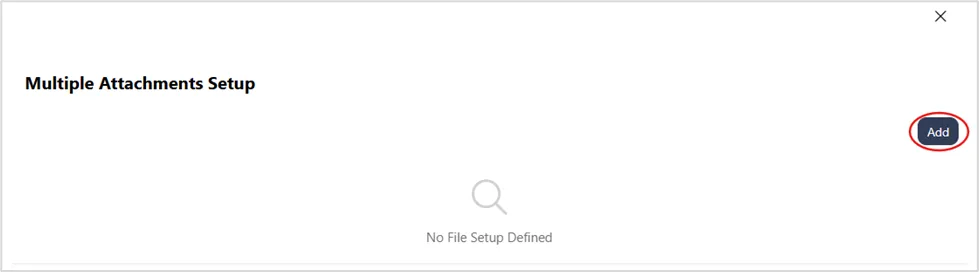
In the MultipleAttachments Setup dialog that appears, select Add.
In the Attachments Setup dialog that appears, enter or edit the following attachment options and select Save.
Field | Description | Default value |
|---|---|---|
Subject/Group | Mandatory field | |
Description | Description of the attachment; mandatory field | |
Shown on | Select one or more of:
| Create, Update, and Close |
Required on | Select one or more of:
| Create, Update, and Close |
File Types | Select a file type for the attachment | All file types |
Only when User type | Select from:
| All user types |
Additional Attribute Label | To display an additional field for the user to fill out when uploading this attachment, enter the label for the additional field | |
Save Destination | Select from:
| Local |
Active | Select from:
| Yes |
Sequence | Select what number this attachment is in the sequence of attachments | Consecutive |
Size Limit | Set a limit to attachment size | None |
Show Valid Until Date | Select from:
| No |
Repeat steps 3 and 4 for as many attachments as you want to add.
Close the Multiple Attachments Setup dialog.
At the bottom right of the page, select Save.
Disabling attachments
You can disable attachments at any time.
To disable attachments:
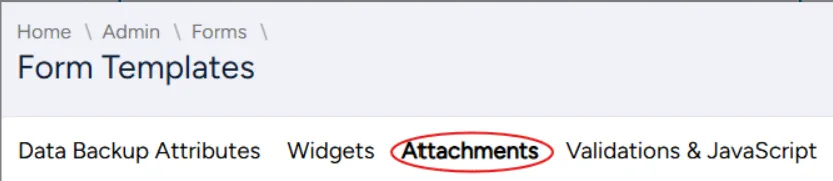
From the tabs at the top, choose Attachments.
If your form has one attachment, in the Attachment Option dropdown list, select Hide.

If your form has multiple attachments, select Multiple Attachments Setup.

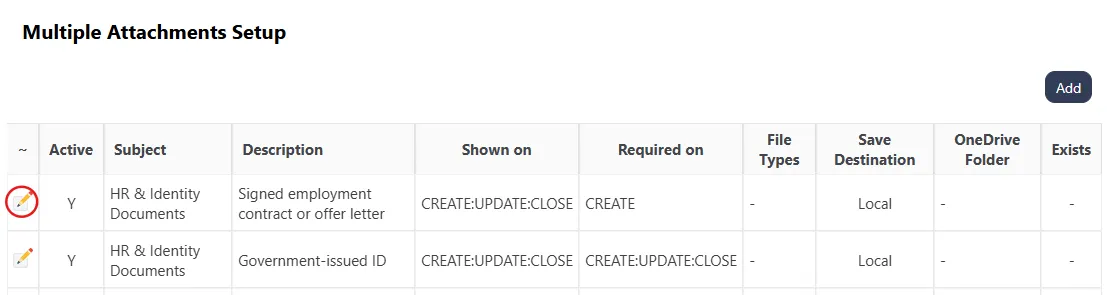
In the Multiple Attachments Setup dialog that opens, select the pencil icon on the row corresponding to the attachment you want to disable.
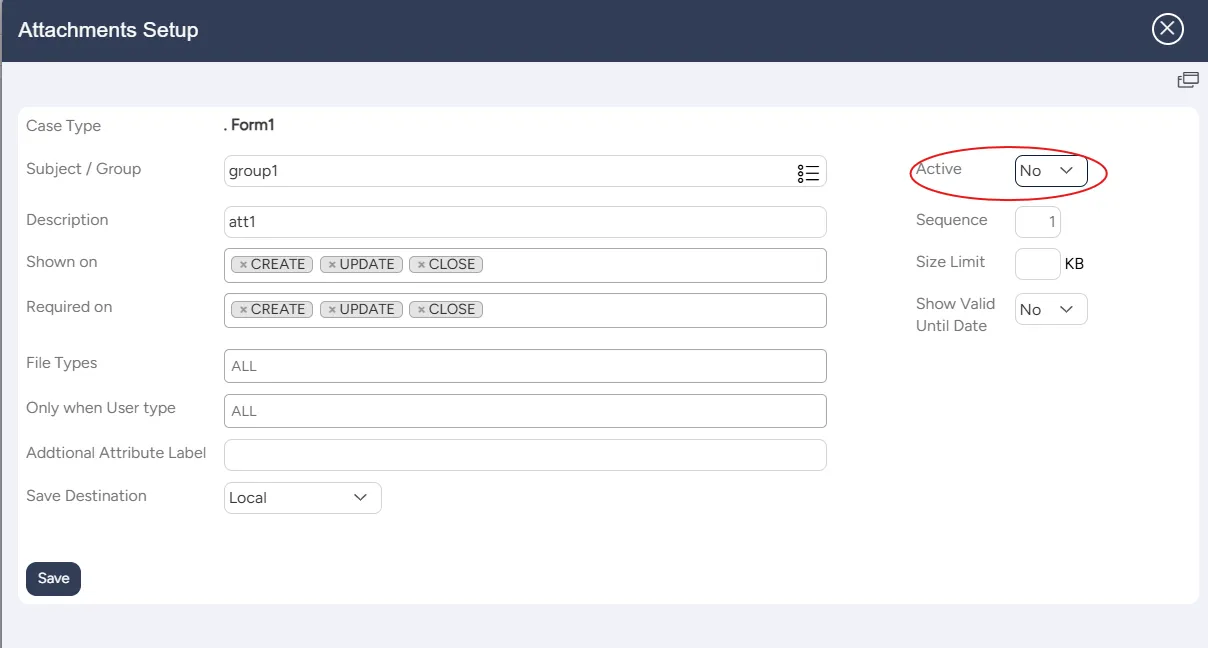
In the Attachments Setup dialog that opens, set the value for Active to No, select Save, and close the Attachments Setup dialog.
Repeat step 5 for all the attachments you want to disable.
Close the Multiple Attachments Setup dialog and select Save.