Ticket Lifecycle Status Codes
How to create a new status? Add new status
How to display the new status in the ticket status list? Edit the ticket status list
How to disable status? Disable a status
The ITCC system includes a set of predefined status codes. You can use all or some of them. You can also add custom status codes or customize the existing status codes to meet your organization's needs.
For example, an organization can have tickets with the following status codes:
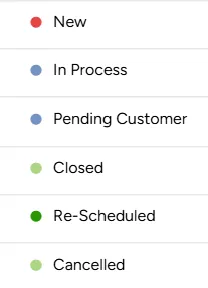
Some of the predefined status codes are essential for the system to function properly. For example, every setup includes the status codes New and In Process.
The final status in a ticket's lifecycle is Closed, although your setup can allow reopening a closed ticket. The Closed status is assigned by the agent or automatically by the system after the requester approves the ticket's resolution. A ticket can also be closed if the requester does not respond to resolution emails within the allotted time.
Some organizations don't make the Closed status code available to agents. They only allow automatic closure. Once the customer approves the resolution, the ticket status automatically changes to Closed.
When a ticket's status changes to Resolved, the SLA calculations stop and the requester is notified of the resolution. If the Closed status code is used, the ticket remains open until its status changes to Closed.
You can combine status codes by creating a parent status code that includes several of the existing status codes (used for analytics and dashboards only).
Predefined status codes
The ITCC system comes with many predefined status codes. Some of them are essential for the system to function and cannot be modified. Others are recommended but can be customized to fit your needs. The rest are optional.
You can also add custom status codes.
Essential status codes
The following status codes are essential to the system and should not be modified:
Status code | Description |
|---|---|
New | Automatically assigned to a ticket as soon as it is opened |
In Process | Assigned to a ticket by agent or automatically when an agent begins working on it |
Pending customer | Assigned by an agent when more information is required from the customer; the system sends automatic reminders while awaiting the customer’s response |
Customer responded | Assigned automatically after the customer responds to the agent's request |
Pending third party | Assigned by an agent when ticket handling involves a third party; selecting this status displays the Supplier field, and the agent can send an email notification to the chosen supplier |
Waiting | Automatically assigned when the ticket is on hold because of dependent subtasks or conditions |
Canceled | Assigned by end user or agent when canceling the ticket |
Resolved | Assigned by agent after resolving the ticket; displays the Resolution field and other closure fields (e.g., Root Cause, Resolved By) according to the ticket type configuration; the ticket remains open until its status is changed to Closed |
Closed | Assigned by agent or automatically to finalize and close the ticket after the customer approves the resolution, or after the customer doesn’t respond to the resolution confirmation emails or pending customer emails |
Reopened | Assigned automatically when a user reopens a closed ticket |
Incident Related Problem | Used in problem management; assigned automatically when an incident is linked to a problem that has synchronization enabled
|
Work-Around Provided | Used in problem management; when a workaround is provided for a problem, the status syncs to related incidents; incidents linked to the problem are updated with the workaround, and the system can notify the customers
|
Resolution Provided | Used in problem management; when a problem is resolved, the status can sync to related incidents, and the system can notify customers that the issue is resolved |
Resolved – Next Version | Used in tickets associated with a planned release; when the ticket status changes to Resolved – Next Version, the customer receives an email notification that their ticket will be resolved in the next version of the system, including the release name and release date. (This status is less commonly used.) |
Approved | Assigned automatically by the system; indicates that a ticket has been approved by the approver |
Rejected | Assigned automatically by the system; indicates that a ticket has been rejected by the approver |
Recommended status codes
The following status codes are recommended by ITCC but can be renamed or otherwise customized for your organization's needs.
Status code | Description |
|---|---|
Rescheduled | Assigned by agent or automatically when the ticket is rescheduled for a future date or time, based on customer request or internal scheduling needs |
Setting up ticket status codes
You can set up ticket status codes at any time.
To set up status codes:
On the left side menu, select Administration.
In the search bar under Search for Admin Configuration Options, type Status Codes and select the Status Codes option that appears.
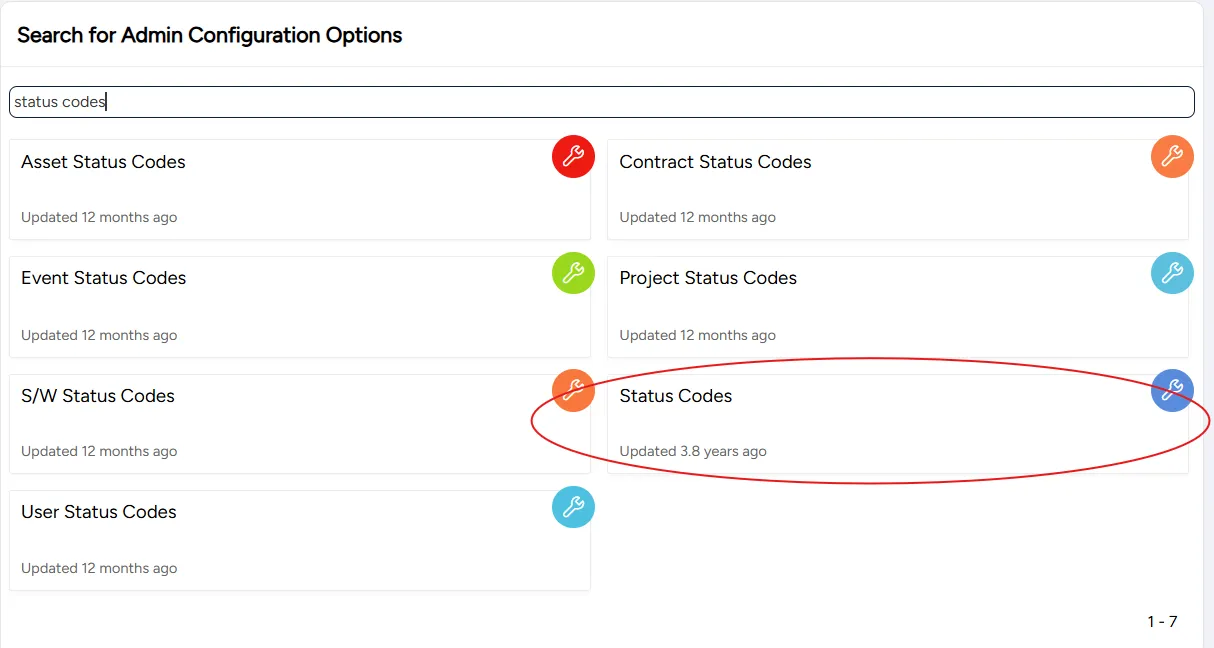
On the Status Codes page that opens, you can:
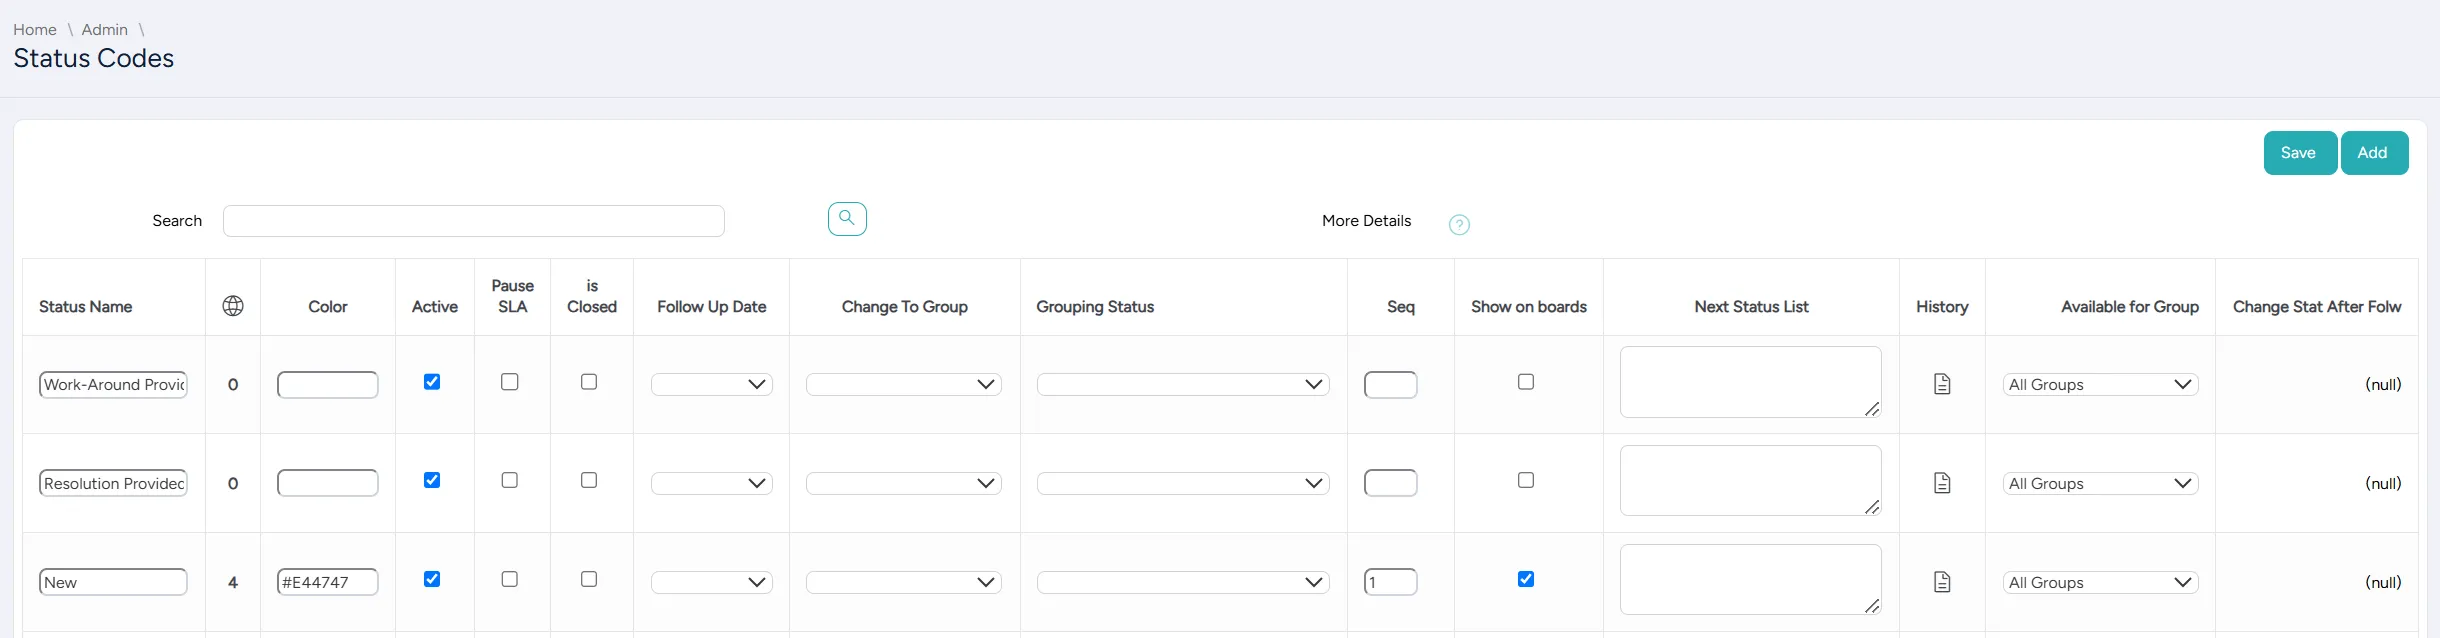
Select Save.
Adding or editing a status code
You can add a new status code or edit an existing status code at any time.
To add or edit a status code:
On the Status Codes page:
- To add a new status code: select Add
- To edit an existing status code: search for or scroll down to the status code you want to edit
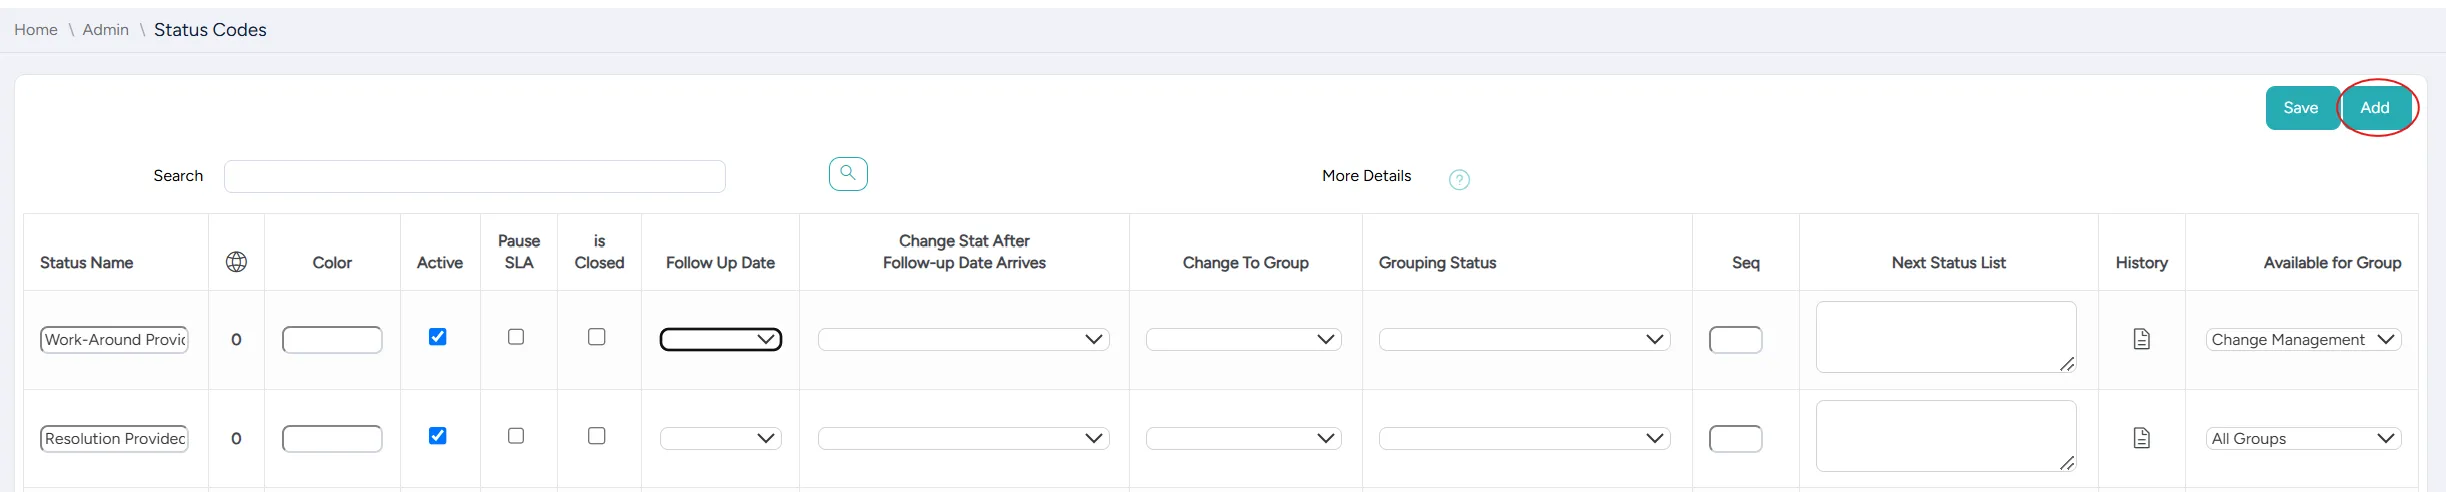
Enter or edit the status code's settings:
Field | Description |
|---|---|
Status name | Enter a meaningful name for the status code |
Language | Select to enter translations of the status codes into other languages (when adding a new status code, you must save it before entering translations) |
Color | Enter the hex color code associated with the status; this color is displayed next to the status code |
Active | Select to activate the status code; clear to deactivate the status code |
Pause SLA | Select to pause the SLA while the ticket has this status |
Is closed | Select if this status indicates that the ticket is closed |
Follow Up Date | Leave blank if this status code does not require a follow up date; otherwise select:
|
Next Status after Follow-up Date
| If Follow up date is Rescheduled, select the status to which this ticket changes automatically when the follow up date arrives |
Change to group | Optional: select a group to which a ticket is routed when it has this status |
Grouping Status (Used for Analytics)
| If this status code belongs to a group of status codes, select the parent status code of the group (see Combining status codes) This is useful when filtering by status code on dashboards. |
Available for group | To limit the status code to a specific group: select the group for which this status is available |
History | Select to view the history of all changes made to this status code by admins |
Select Save.

Disabling a status code
You can disable a status code by deactivating it.
To deactivate a status code:
On the Status Codes page, search for or scroll down to the status code you want to deactivate.
In the line corresponding to the code you want to deactivate, clear the checkbox in the Active column.

Select Save.

Combining status codes
You can combine status codes and use one code to refer to a group of codes. This is useful when filtering by status code on dashboards.
You can combine status codes by creating a parent code and marking the codes you want to combine as children of the parent code.
For example, you can create a parent code Pending and specify that several other codes, such as Pending Customer and Pending Third Party, are children of the Pending code.
To combine status codes:
On the Status Codes page, add a status code with a meaningful name that denotes the parent status of the codes you want to combine.

For each of the codes you want to combine:
- On the line corresponding to the code, in the Grouping status column, click to open the dropdown list.
- From the dropdown list that appears, select the parent code you created.
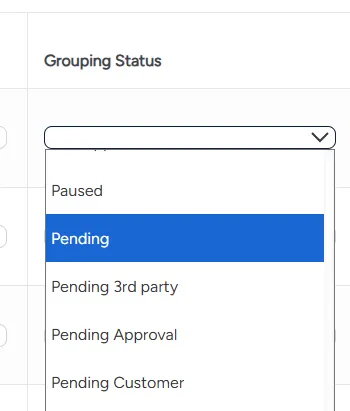
Select Save.
Scheduling tickets using status codes
You can use status codes to manage your tickets more effectively.
When a ticket's status is set to Rescheduled, the system displays the Follow Up Date field, which indicates the date the agent is expected to follow up on the ticket.

(You can change the name of the Rescheduled status or create additional status codes that also display the Follow Up Date field when adding or editing a status code.)
The Follow Up Date functionality enables agents to:
- Set reminders to return to a ticket at a specific time (e.g., when a customer asks to be called back at a certain hour)
- Pause SLA calculations until the follow-up date arrives (if Pause SLA is on)
- Reduce noise in the working list by temporarily moving “future” tickets out of focus until the follow-up date arrives
When setting up status codes, for each status code, you can set its Follow Up Date setting to one of the following values:
- None
- Informative
- Reschedule
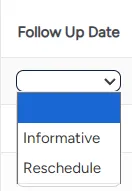
When the Follow Up Date is set to Reschedule, the ticket does not appear in the current work list before the follow up date. You can set up an email template to notify the agent when the follow up date arrives.
For example, if an agent needs to follow up with a customer who is currently unavailable, the agent can set up the Follow Up Date to Reschedule. The ticket will disappear from the agent's work list until the follow up date arrives. At that point, the agent will receive an email reminder and the ticket will reappear in the work list.
Add a status code to a ticket type's status list
Each ticket type has its own list of status codes available to it.
When you create a new status code, you can add it to any ticket type's status list.
You can also add an existing status code to any ticket type's status list at any time.
To add a status code to a ticket type's status list:
On the left side menu, select Administration.
In the search bar under Search for Admin Configuration Options, enter Setup Ticket Type and select the Setup Ticket Type option that appears.
On the Ticket Types page, search for or scroll down to the ticket type you want to edit and select its Edit icon.
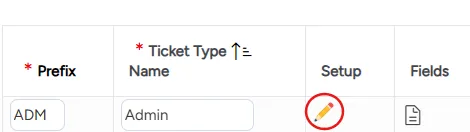
On the Setup Admin page that opens, on the left side menu, select Statuses.
From the Available Statuses list, select the status you want to add. The status appears in the ticket status list.

Select Save.