Portals
Portal Overview
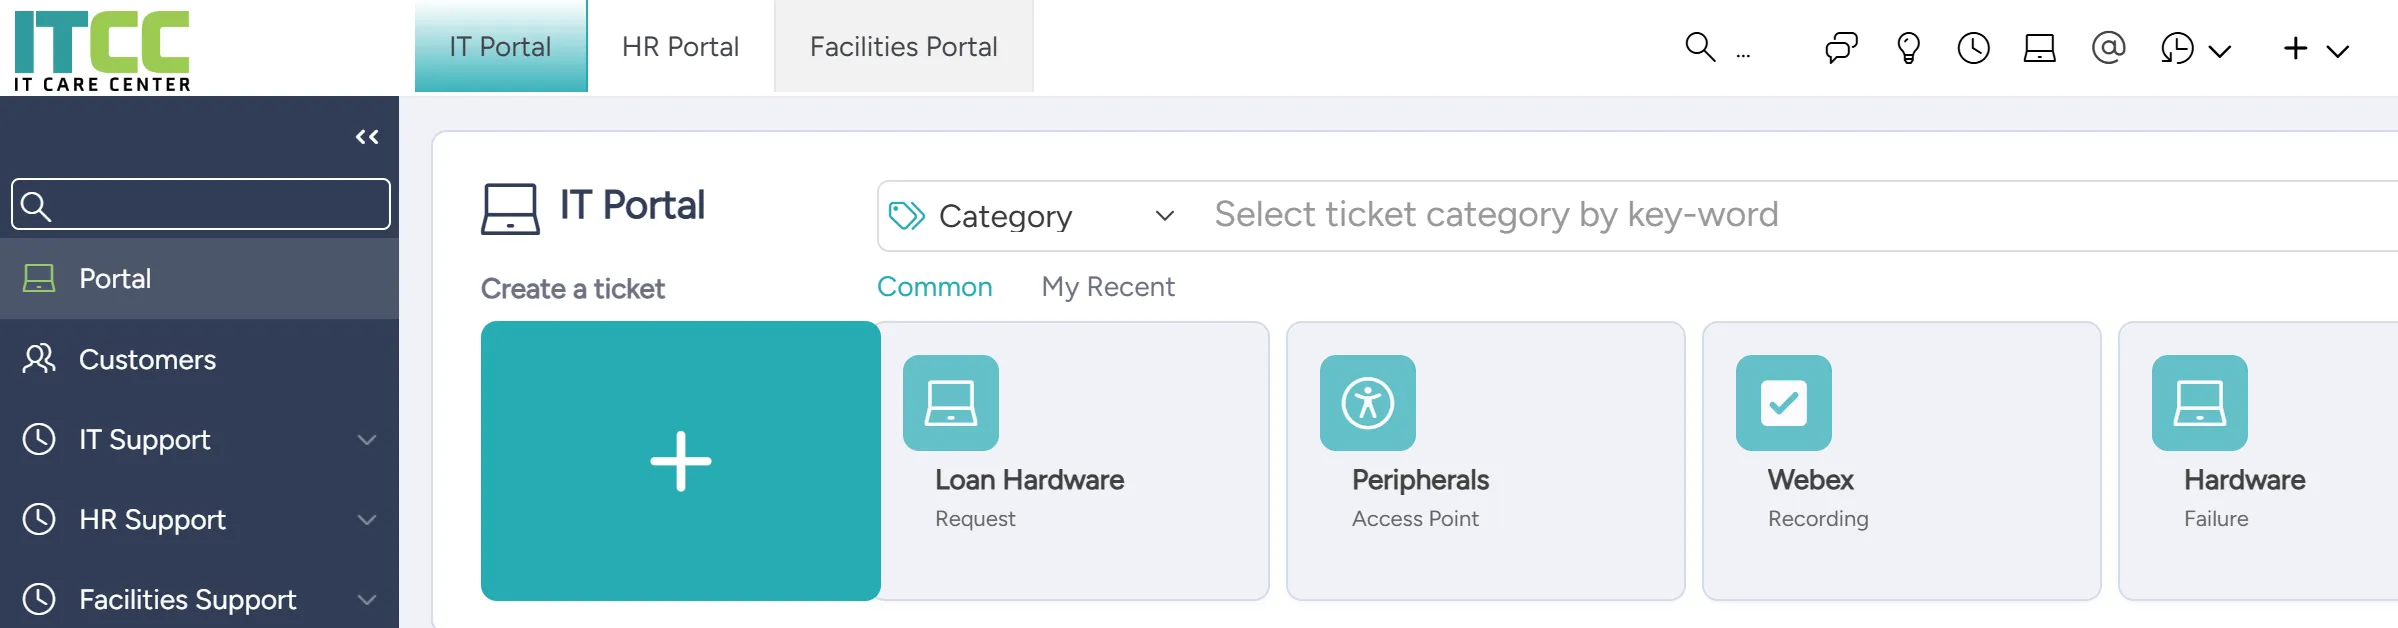
ITCC makes it simple for you to manage wide areas of requests by defining portals for each area. Each portal is displayed in a separate tab.
For example, many organizations use separate portals for IT, HR, and Facilities, as shown in the following figure:
The ITCC system comes with predefined portals, which are sufficient for most organizations. However, if necessary, the system enables the administrator to define their own custom portals.
ITCC also allows you to customize the existing portals, adding your organization's logo, associating specific ticket types with the portal, and setting up default ticket templates.
Portal settings and ticket templates
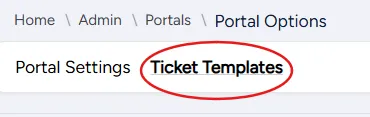
Each portal has Portal Settings and Ticket Templates associated with it. Each is represented by its own tab.
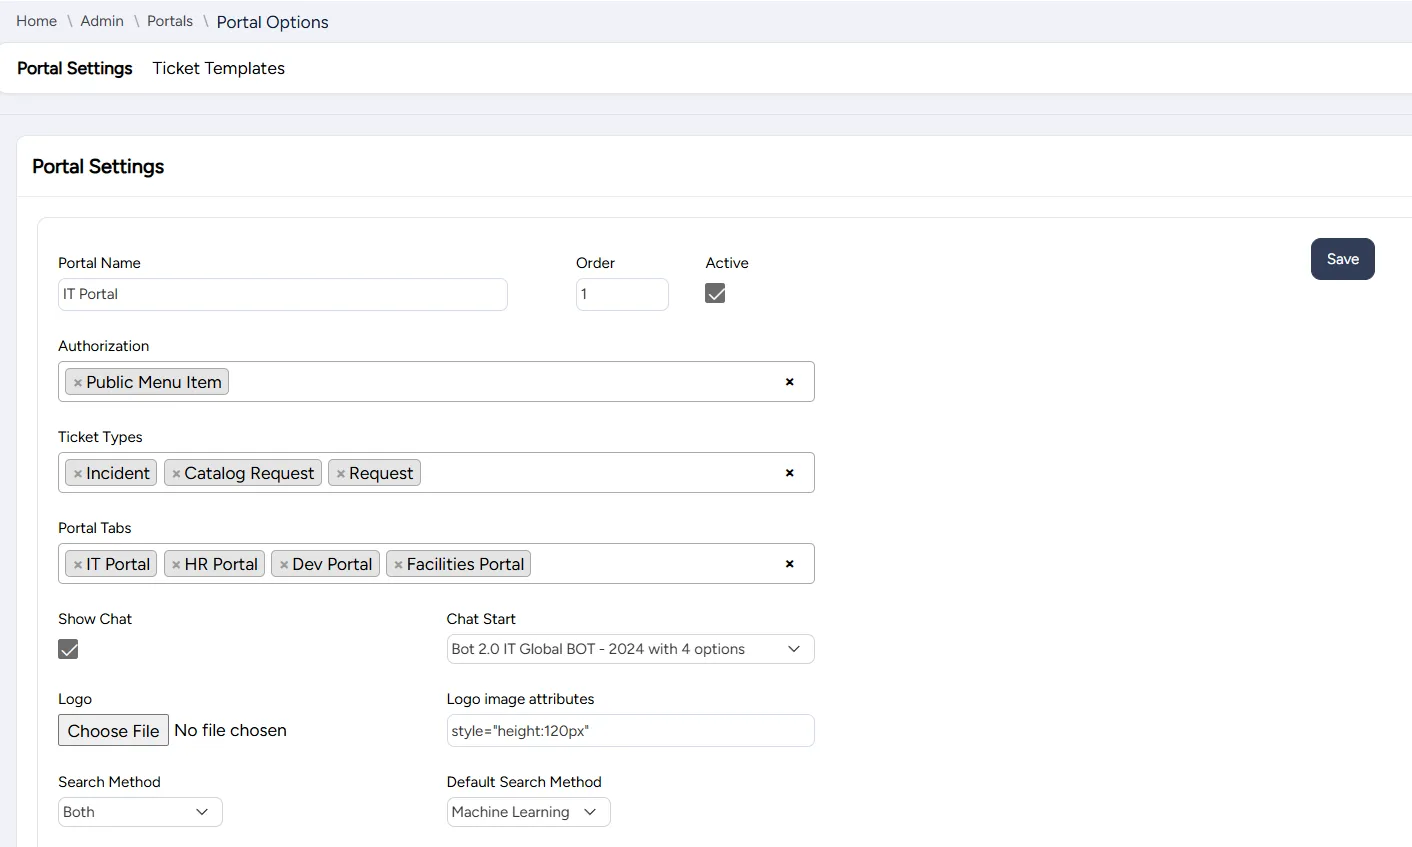
You can specify the portal settings when adding or editing a portal.
You can also set up ticket templates for this portal.
Setting up portals
You can set up portals at any time.
To set up portals:
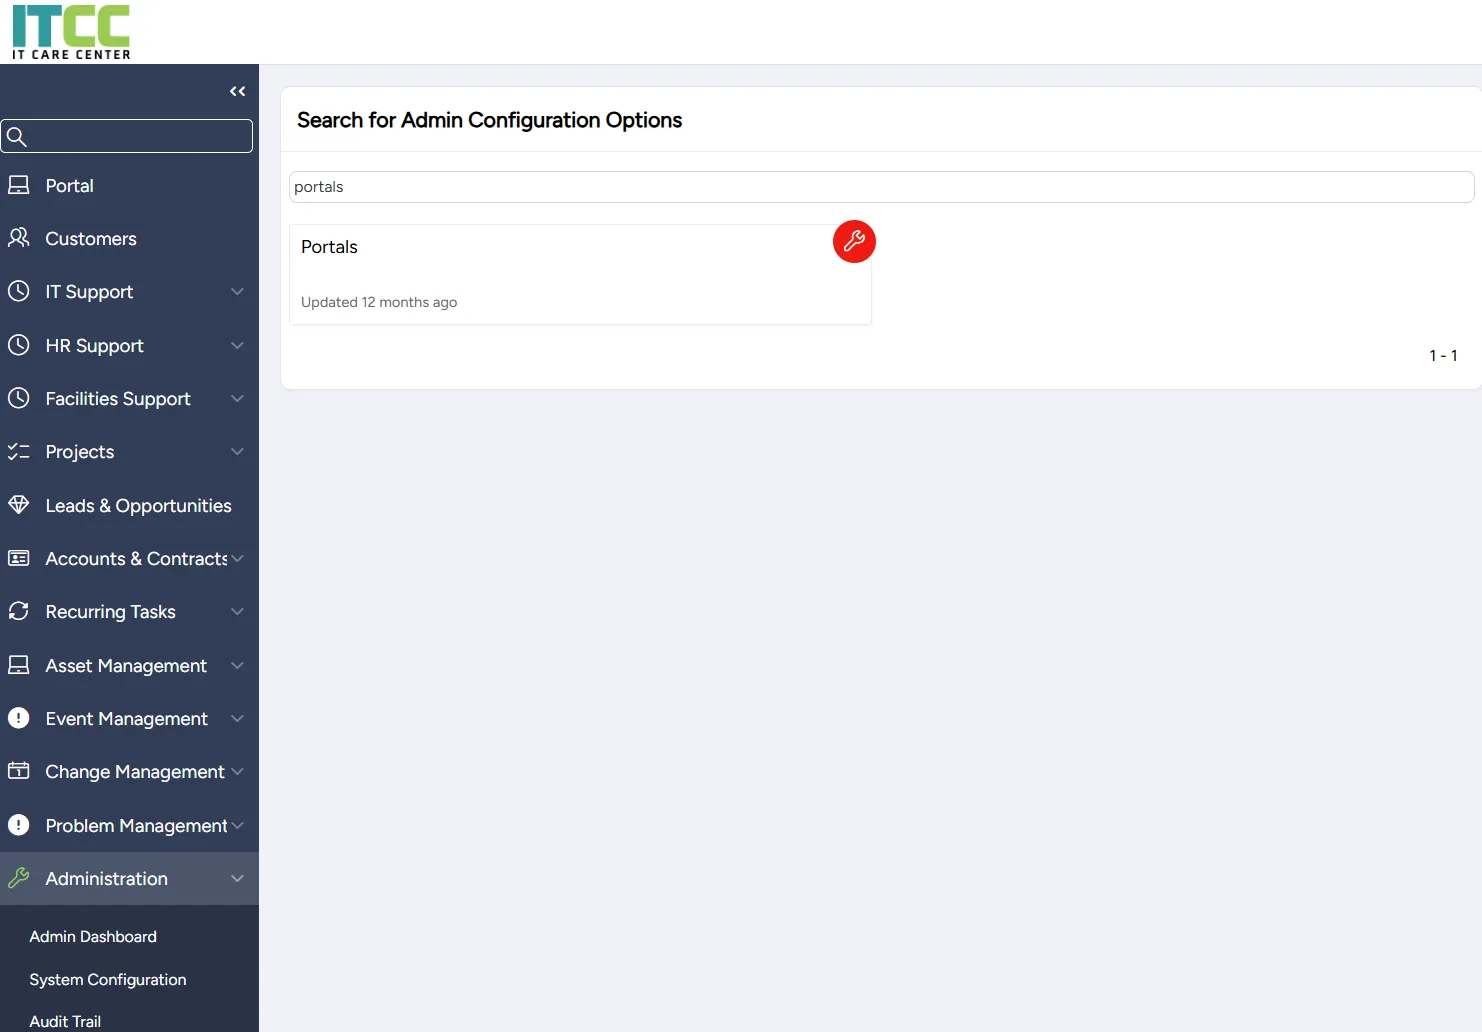
On the left side menu, select Administration.
In the search bar under Search for Admin Configuration Options, type Portals and select the Portals option that appears.
Adding a new or editing an existing portal
You can add a new portal or edit an existing portal at any time.
When adding the lead portal that opens first whenever the user accesses portals, select all the portals you want to make available in the Portal tabs field.
To add or edit a portal:
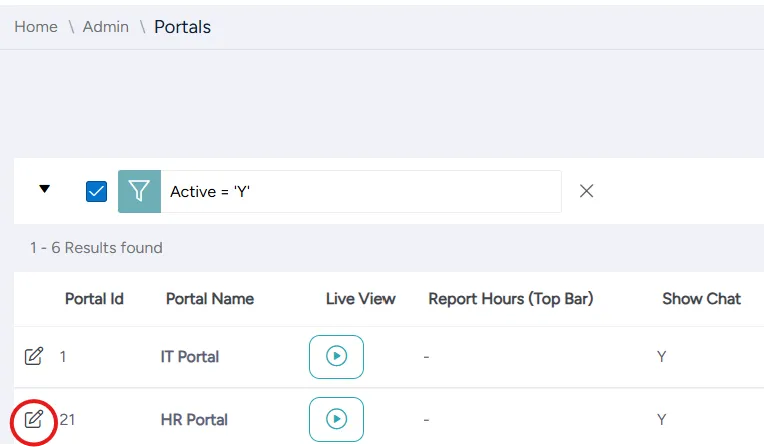
On the Portals page:
- To add a new portal: select Add

- To edit an existing portal: scroll down to the portal you want to edit and select the Edit icon
On the Portal Options page that appears, under the Portal Settings tab, enter the new portal's settings:
Field | Description |
|---|---|
Portal name | Enter a meaningful name for the portal |
Order | Enter the portal's order in its appearance on the page |
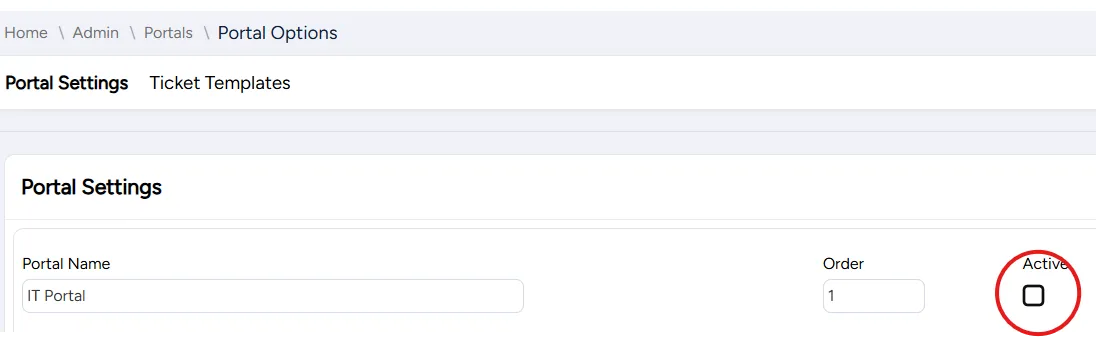
Active | Select if the portal is currently active |
Authorization | Use to limit the portal to specific user types, groups, or roles |
Ticket types | Choose the ticket types to be available in this portal |
Portal tabs | Select which portal tabs are visible, in order of appearance; include the lead portal itself |
Show chat | Select to include chat in this portal |
Chat start | Choose the chatbot for this portal |
Logo | (Leading portal only) select an image file of a logo to include in the portal appearance |
Logo image attributes | (Leading portal only) enter the logo image attributes, such as height |
Search method | Choose the type of category search available for this portal:
|
Default Search Method | If both search methods are used, choose the default search method |
Items | |
Show "My Tickets" | Select to display My Tickets section in this portal |
Title | (Optional) Enter a different title for My Tickets section |
Show "My Pending Approvals" | Select to display My Pending Approvals section |
Title | (Optional) Enter a different title for My Pending Approvals section |
Show "Assigned To Me" | Select to display Assigned to Me section |
Title | (Optional) Enter a different title for Assigned to Me section |
Show "Reported by Me / My Employees" | Select to display Reported by Me/My Employees section |
Title | (Optional) Enter a different title for Reported by Me/My Employees section |
Show "Knowledge" | Select to display the Knowledge section |
Title | (Optional) Enter a different title for the Knowledge section |
Show "My Assets" | Select to display the My Assets section |
Title | (Optional) Enter a different title for My Assets section |
Show "Quick Links" | Select to display the Quick Links section |
Title | (Optional) Enter a different title for the Quick Links section |
Announcements | Select to display announcements |
 | Select to enter or edit portal's label translations into different languages |
Open a Ticket Title | Enter HTML that contains the portal's icon and title (Example: <span class="fa fa fa-user-heart" aria-hidden="true" style="font-size:22pt;color: #ffbc00;font-weight: 800;"></span><span> HR Portal</span>) 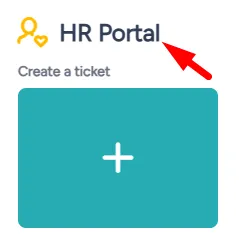 |
(Optional) Under the Ticket Templates tab, set up ticket templates for this portal.
- To add a new portal: Select Create.

- To save changes to a portal's settings: Select Save.
Ticket templates
When a user accesses a portal, ticket templates are available for the user to choose from.
When a user uses a template to open a ticket, certain fields are assigned specific values. Additional fields may be included in the ticket, requiring the user to enter some ticket-specific information.
For example, the user may see the following templates:
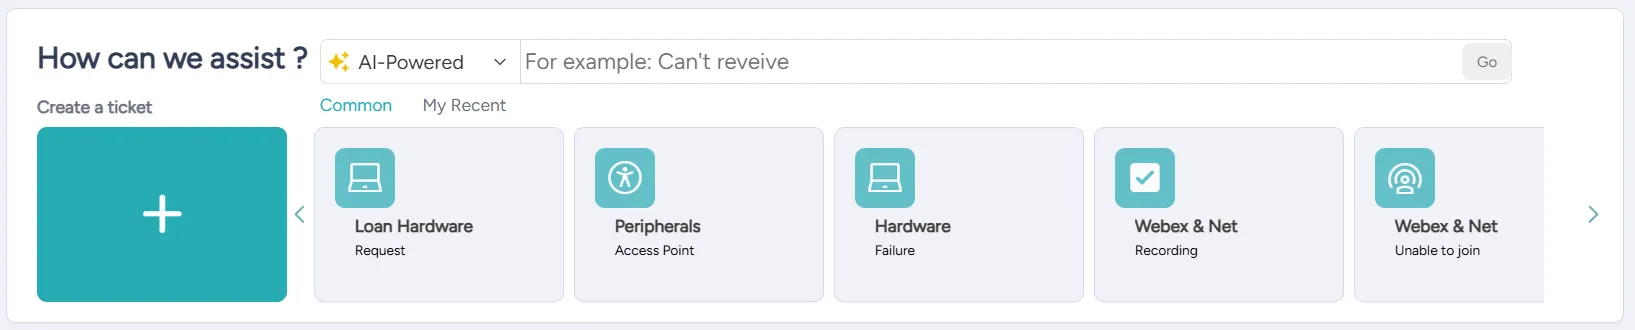
Under the My Recent tab, you can view your most recent templates. The available templates vary from user to user.

Under the Common tab, you can view the templates you set up.

You can choose to display predefined templates, dynamic templates, or a combination of both.
Setting up ticket templates
You can set up the following ticket templates:
- Predefined: you select the ticket type and category
- Dynamic: the system selects the most frequently used templates in the past given number of days; you select the number of days
To set up ticket templates, on the Portal Options page, select the Ticket Templates tab.

Setting up predefined ticket templates
You can set up predefined ticket templates at any time. You can include as many predefined ticket templates as you need.
To set up predefined ticket templates:
On the Ticket Templates tab, in the Predefined Ticket Templates section:
- to edit an existing template: select any cell in the template spreadsheet and select Edit
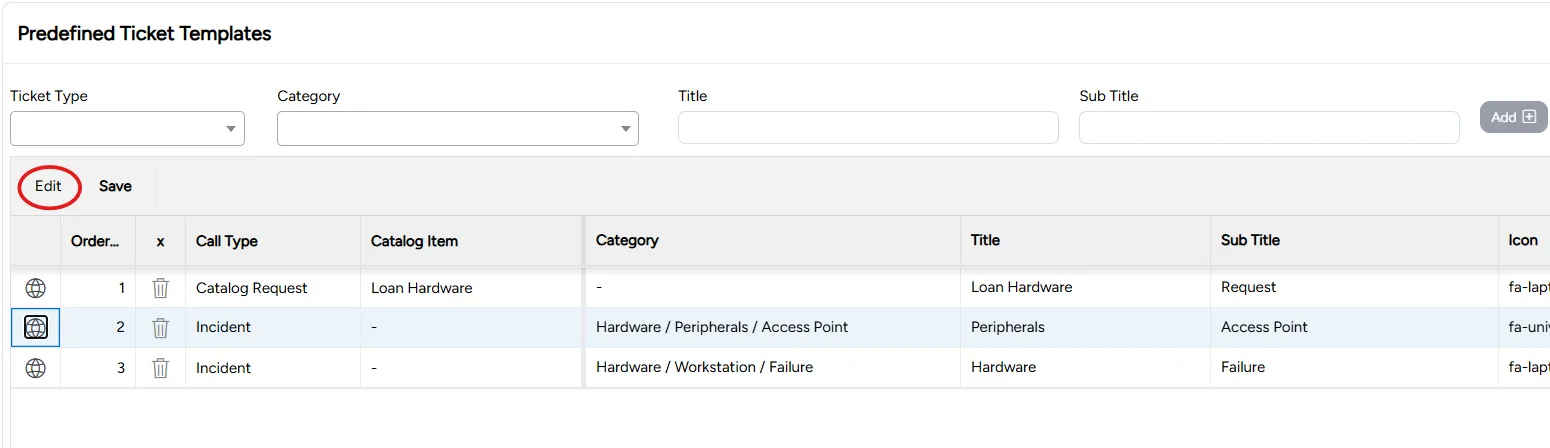
- to add a new template:
- select the template's ticket type
- select the template's category
- enter the template's title
- enter the template's subtitle
- select Add

Setting up dynamic ticket templates
You can choose to include dynamic templates in your portal. Dynamic templates are determined in real time based on data accumulated across all users, but available templates may be different for different users, depending on the user's permissions.
Dynamic templates are selected automatically by the system based on the most frequently used ticket types and categories over the number of days that you define. You can view the frequency statistics of each template during setup.
The titles and subtitles of dynamic templates are assigned automatically by the system.
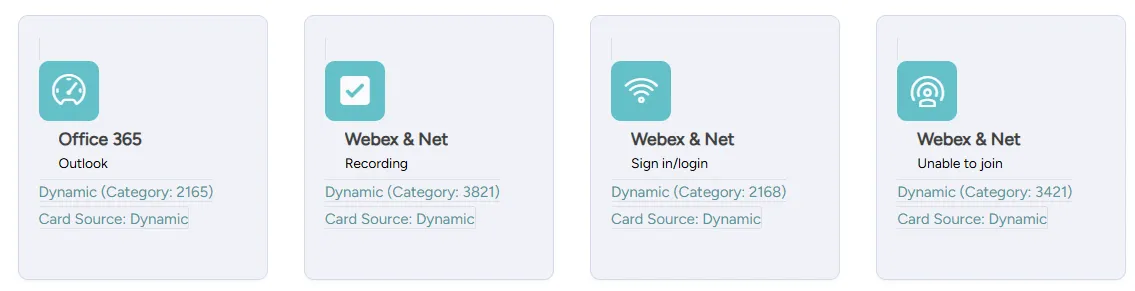
You can choose how many dynamic templates to include. During setup, you can preview the dynamic templates.
For example, your Dynamic Ticket Templates setup can look as follows:
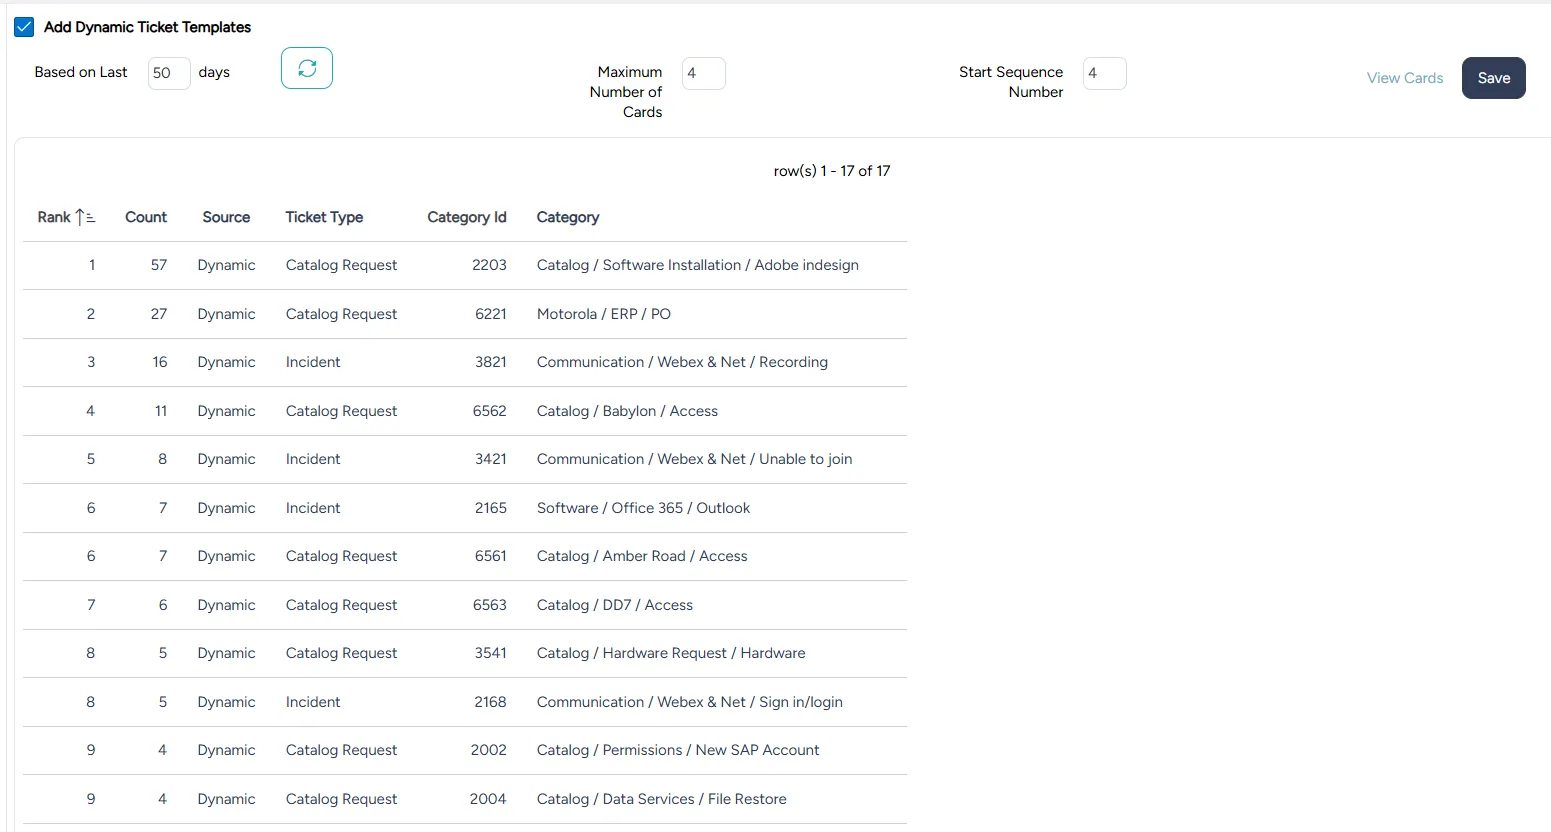
In this example, over the past 50 days, the most frequent templates include both Incidents and Catalog Requests.
If you are not an employee, the dynamic tickets visible to you are the top Incidents from the most frequent list:
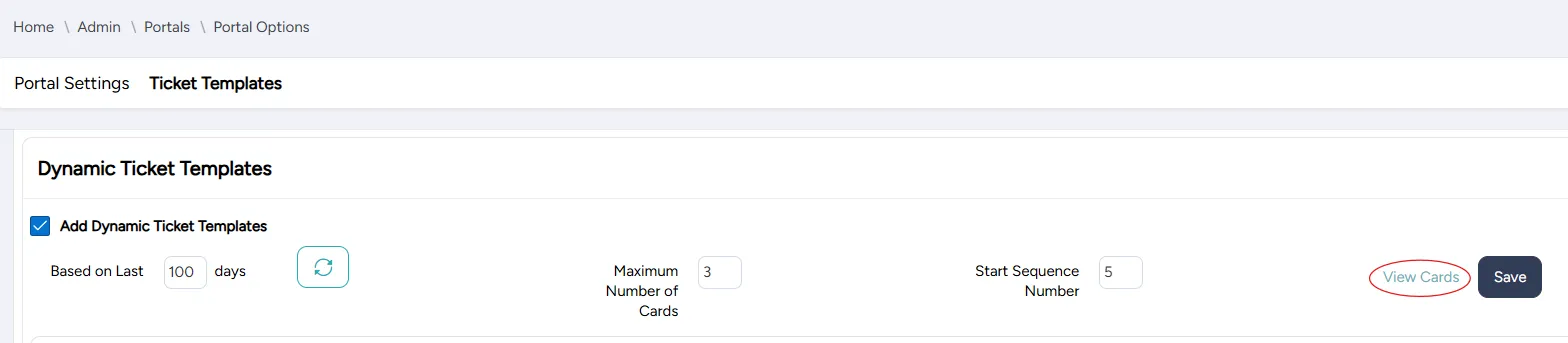
To set up dynamic ticket templates:
On the Ticket Templates tab, in the Dynamic Ticket Templates section, select Add Dynamic Ticket Templates.

Enter the following settings:
Field | Description |
|---|---|
Based on Last... Days | Enter the number of days to use in the frequency calculations |
Maximum Number of Cards | Enter the number of dynamic templates to include |
Start Sequence Number | Enter the sequence number for the first dynamic template; can be before, after, or among the predefined templates |
Select Save.
To view the dynamic templates, select View Cards.
Disabling a portal
You can disable a portal at any time. A disabled portal can be enabled at any time.
To disable a portal:
On the Portals page, scroll down to the portal you want to edit and select the Edit icon.
On the Portal Options page that opens, clear the Active checkbox.
Select Save.