Incoming email integration
Users of the ITCC system can communicate with the system through email.
A requester can open a ticket by email. The system sends updates to the requester by email throughout the ticket lifecycle. Some emails require a response from the requester.
Your organization needs to set up email integration for:
Setting up incoming email integration
The ITCC staff can set up your incoming email integration during onboarding. You can edit your settings at any time.
To set up incoming email integration:
On the left side menu, select Administration.
In the search bar under Search for Admin Configuration Options, enter Incoming Email Integration and select the Incoming Email Integration option that appears.

From the Incoming Email Integration page, you can:
Adding or editing incoming email integration
You can add a new or edit an existing email integration at any time.
To add or edit email integration:
On the Incoming Email Integration page:
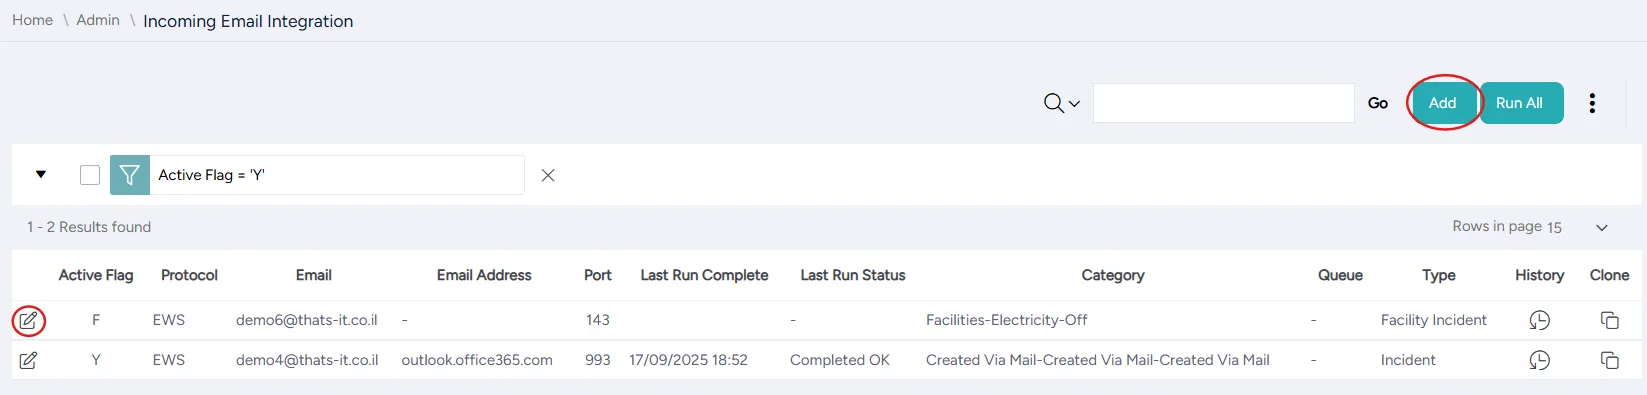
- to add a new integration: select Add
- to edit an existing integration: select the Edit icon in its corresponding row
In the Connection tab, follow the steps in Azure Connectors.

In the Create Ticket Information tab, enter or edit the following settings and set up parsing rules.
Field | Description |
|---|---|
Create tickets | Select to create a new ticket whenever a new email is received |
Type | (Mandatory) Select the type of the new ticket |
Default Category | (Mandatory) Select the category of the new ticket Category name can consist of three parts, separated by a period:
|
Dispatch Group | Select a group to which the new ticket is dispatched (if different from default) |
ML Category Classification | Toggle to enable machine-learning based automatic ticket classification based on the email subject and content |
Ticket Types Eligible for ML Classification | If ML Category Classification is on, select which ticket types can be automatically created; tickets that do not match any of the selected types will be handled according to default rules |
Auto-Reply Subject | When a ticket is not created, an auto-reply is sent; enter the subject of the auto-reply email |
Auto-Reply Body (Value Required) | When a ticket is not created, an auto-reply is sent; enter the body of the auto-reply email |
In the Exclude Email List tab, use the spreadsheet to enter email addresses that do not initiate ticket creation.
Select Save.
Disabling incoming email integration
You can disable any incoming email integration at any time. You can enable a disabled integration at any time.
To disable incoming email integration:
On the Incoming Email Setup page, in the Connection tab, from the Enabled dropdown list, select Disabled.

Select Save.
Running email integrations
Each incoming email integration automatically checks for new emails every specified interval. By default, the interval is a minute.
You can run either one or all the incoming email integrations manually, in addition to the automatically scheduled times.
To run all the incoming email integrations simultaneously:
- On the Incoming Email Integration page, select Run All.

To run one incoming email integration:
- On the Incoming Email Setup page, in the Connection tab, select Run Once.

Creating a new ticket in response to an email
When the system receives a new email that is not in response to any previous communication, it can automatically create a new ticket.
The new ticket's type, category, and routing are determined by the default values you set in Step 3 of adding or editing incoming email integration.
To enable automatic ticket creation, select Create Tickets in the Create Ticket Information tab in Incoming Email Setup.

Setting up an auto reply
If you choose not to open a ticket upon receipt of a new email, you can instead set up an auto reply, which is emailed to the sender in response to any email.
To set up an auto reply, clear the Create Tickets checkbox and fill in the Auto-Reply Subject and Auto-Reply Body fields in the Create Ticket Information tab in Incoming Email Integration setup.

Using parsing rules
The ITCC system's parsing rules capability enables automatic creation of different types of tickets based on the subject and content of incoming emails.
The parsing rules extract the values of specific attributes based on the surrounding text.
For example, the following rule extracts the value of the Submitter attribute from a text that is expected to have the word "Submitter:" before the value and "</span>" after the value.

The surrounding text you enter in Between Text and Until Text is case insensitive.
You can set up as many parsing rules as you need. You can add new parsing rules or edit the existing parsing rules at any time.
You can also use parsing rules to enable Machine Learning-based routing.
To set up parsing rules:
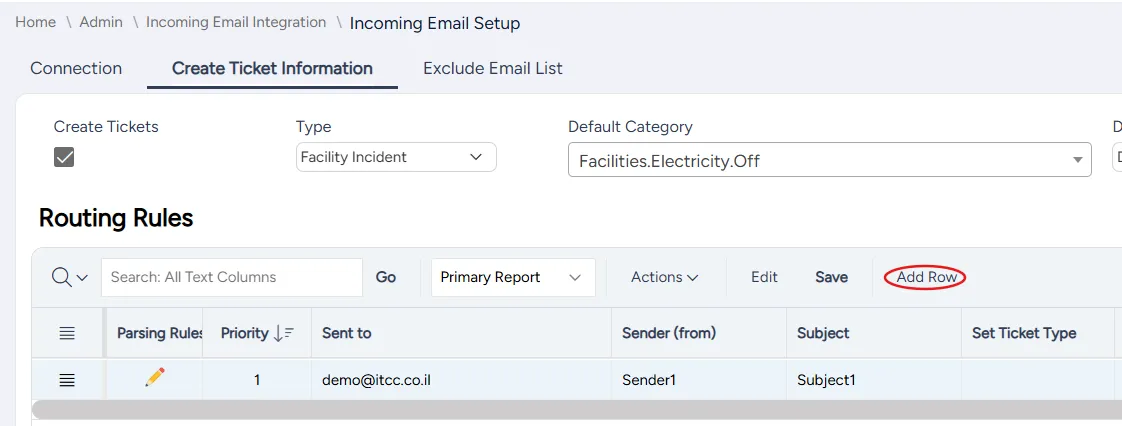
In the Create Ticket Information tab, in the Routing Rules spreadsheet:
- to add a new rule: select Add Row
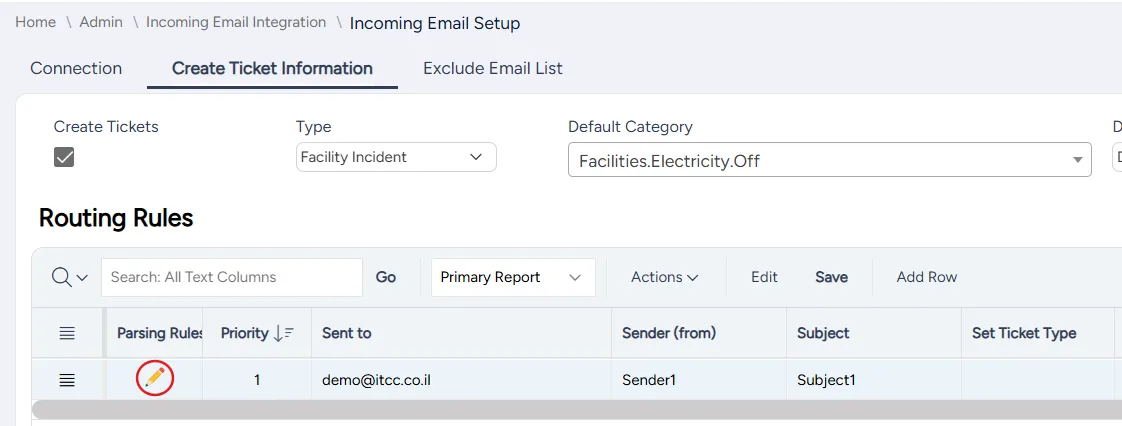
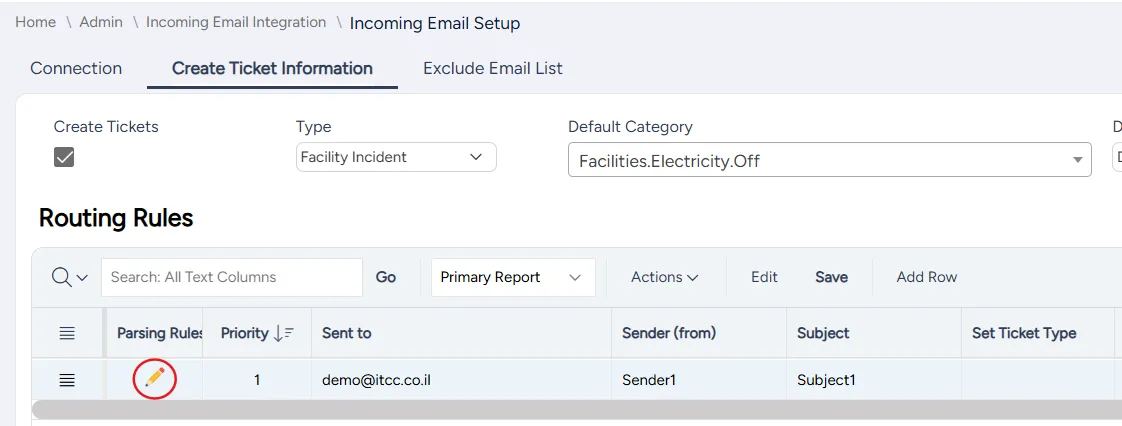
- to edit an existing rule: select the Edit icon in the row corresponding to the rule you want to edit
Enter or edit the following settings:
Field | Description |
|---|---|
Parsing Rules |
|
Priority | Enter the ticket's priority |
Sent to | Enter the email address the email is sent to |
Sender (from) | Enter the email address the email is sent from |
Subject | Enter the subject of the email |
Set Ticket Type | Select the ticket type; use *Set by ML Engine to enable automatic assignment |
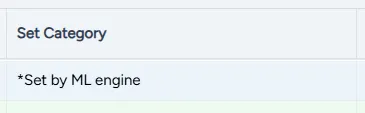
Set Category | Select the ticket category; use *Set by ML Engine to enable automatic assignment |
Set Group | Select the group where the ticket is route |
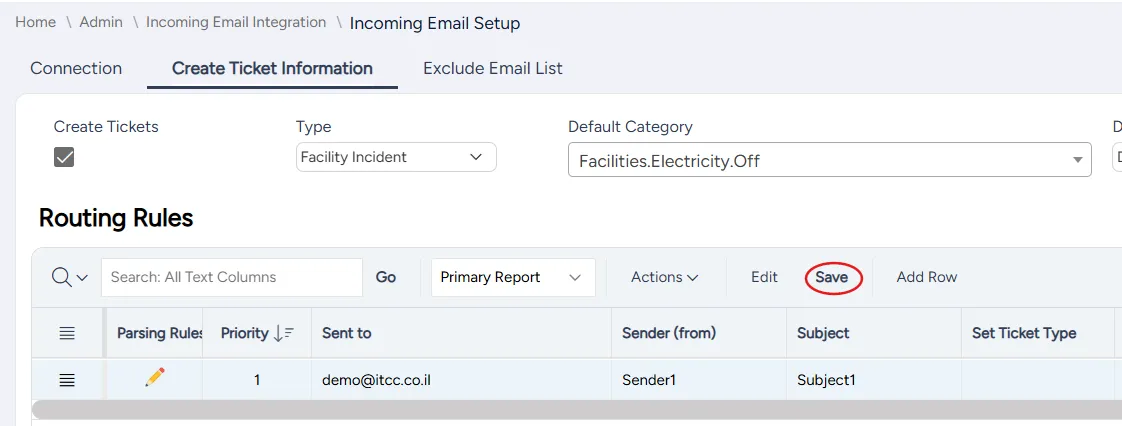
At the top of the spreadsheet, select Save.
Select the Edit icon of the new row or the row you want to edit.
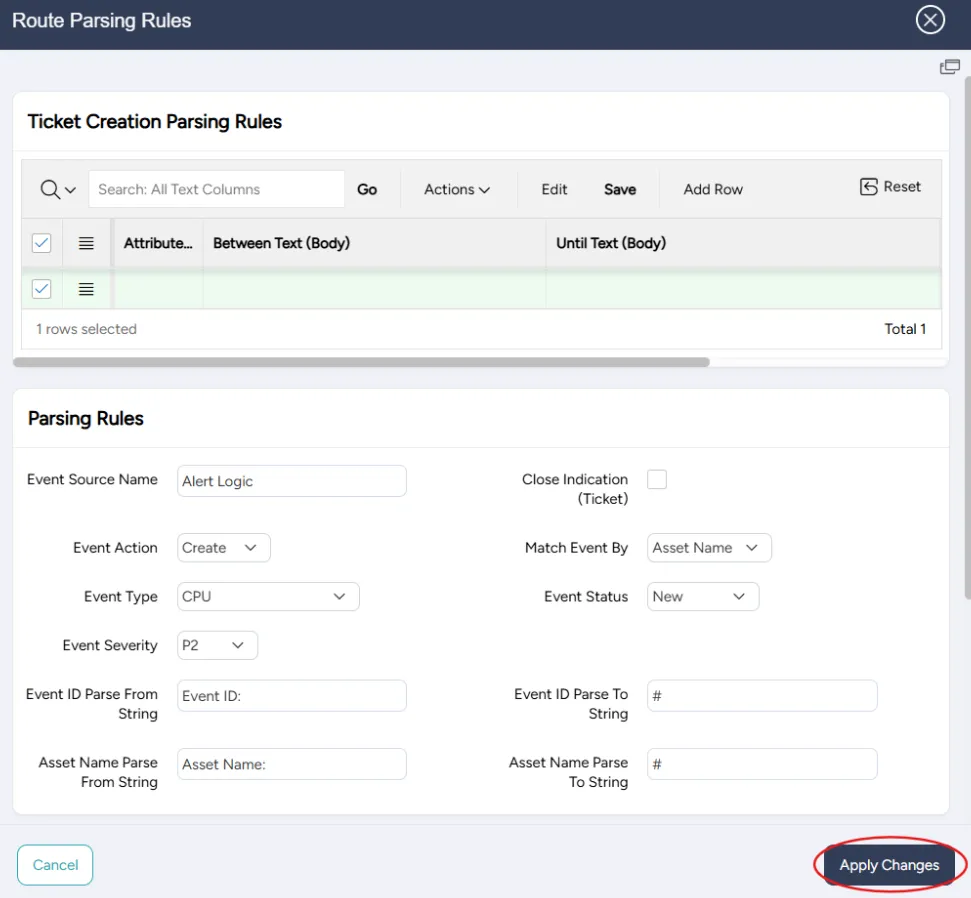
In the Route Parsing Rules dialog that opens, enter or edit the Ticket Creation Parsing Rules settings. You can add as many rules as you need.
Field | Description |
|---|---|
Attribute | Enter the name or number of the attribute to fill with the value |
Between Text (Body) | Enter the text appearing before the value |
Until Text (Body) | Enter the text appearing after the value |
Select Apply Changes and close the dialog.
Select Save.
Using ML-based routing
In parsing rules, you can enable Machine Learning-based automatic group and category assignment.
To enable automatic group assignment:
In Routing Rules, in the Set Ticket Type column, select *Set by ML engine.
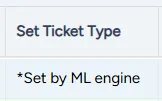
To enable automatic category assignement:
In Routing Rules, in the Set Category column, select *Set by ML engine.