Groups
What is the difference between the group tiers and the group types? Groups overview
How to create a new group? Creating a group - guide
How to add a group member? Add a group member
How to remove a group member? Disable a group member
Groups Overview
Your organization can classify the agents into groups based on their particular skill sets and the services they provide.
For example, your support groups may include HR, Service Desk, Facilities, and others, as in the following figure:
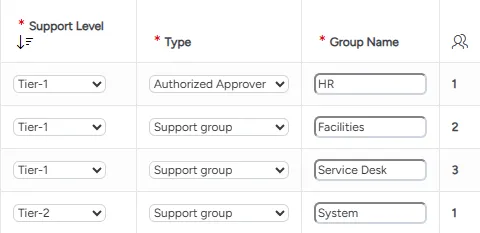
A group can consist of as many members as needed. Each member must be a user.
A group can have a manager. When you add a member, you can mark them as the manager.
Each group must have at least one user. If a group does not have users, then the tickets assigned to this group are not seen by any agent.
For each group, you can customize status codes available to it.
For each group, you can set up priorities for automatic ticket assignment.
Group types
In addition to support groups, the ITCC system includes other types of groups.
For example, Authorized Requesters group consists of users who are authorized to place requests for new catalog items. Authorized Approvers group consists of users who are authorized to approve requests.
The following group types are available in the system:
- Support Group
- Authorized Requester
- Authorized Approver
- Notification Group
- Project Group
Support Levels
ITCC enables you to classify groups according to the levels of support they provide.
By default, the available levels of support are different tiers (up to 4), as well as Management.
You can also create End User groups for end users that have something in common, such as certain permissions levels.
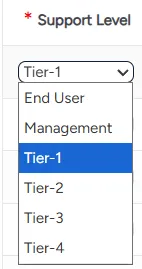
Each subsequent tier provides a higher level of support.
For example, Tier-1 can be the generic Help Desk, which is the first stop for all tickets. Help Desk can resolve simple tickets, such as recovering passwords. A more complicated ticket, such as a network issue, can be escalated to Tier-2, which can be Technicians. An even more complicated ticket can be escalated to Tier-3, which can be Developers.
The Management level has view-only access to all tickets. Management can oversee ticket processing and collect statistics, but Management groups cannot edit, modify, or resolve tickets.
Using groups
You must have at least one non-empty group to use the ITCC system.
After you create a group, you can add members from existing users.
Thus, you use groups as follows:
- (Optional) Customize the group's status codes
- (Optional) Prioritize automatic ticket assignment
Setting up groups
You can set up groups at any time.
To set up groups:
On the left side menu, select Administration.
In the search bar under Search for Admin Configuration Options, enter Groups and select the Groups option that appears.
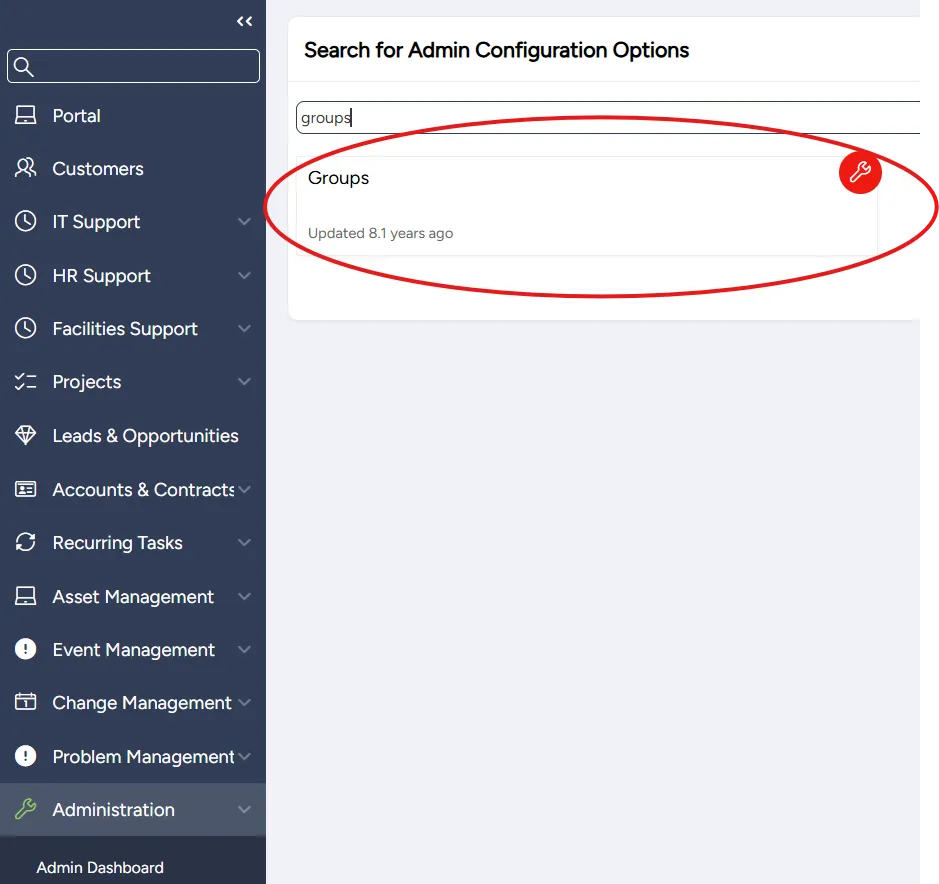
From the Groups page, you can:
Adding a new or editing an existing group
You can add as many groups as your organization needs.
Groups can be added or edited at any time.
To add or edit a group:
On the Groups page:
- To add a new group: select Add; a new row is added
- To edit a group: search for or scroll to the group you want to edit
Enter or edit the following group settings:
Mandatory fields:
Field | Description |
|---|---|
Select level of support associated with the group, such as Tier-1, Tier-2, etc. | |
Type | Select type of group, such as support group, authorized requester group, authorized approver group, etc. |
Group name | Enter a meaningful unique name for the group |
Optional fields:
Field | Description |
|---|---|
Members | Click to edit group members; displays number of members in the group |
Effective from |
|
Effective to |
|
Organization | Select the organization this group belongs to |
Allow Non-Members to Save Changes?
| Select to allow non-members to make changes to the group's assigned tickets |
Accept Required | Select to require the logged in group member to accept a ticket before making changes |
Select to enable automatic assignment of tickets to agents based on your defined priority order | |
Sites Limit | Select to limit assignees based on the members' sites |
Parent Group | Use to combine several groups under a parent group for ease of filtering work lists and other analytics |
Language | View or enter translations of the group's name into other languages |
Customize status codes available to this group | |
History | View the Administration Audit Log listing all the changes made to this group by the admins |
Select Save.
Disabling a group
You can disable a group at any time.
When a group is disabled, you can enable it at any time.
To disable a group:
On the Groups page, search for or scroll to the group you want to disable and enter today's date into the Effective To column.

Select Save.
Adding a member to a group or editing a member's settings
Your group can have as many members as you need.
You can add a member to a group or edit an existing group member's settings at any time.
To add or edit a group member:
In the row corresponding to your group, click on the entry in the Members cell.
(The entry is an integer corresponding to the current number of members in the group or the word (null) if the group is currently empty.)

In the Group Members dialog that appears:
- To add a new member: select Add
- To edit an existing member: search for or scroll down to the member you want to edit.

Enter or edit the member's settings:
Option | Description |
|---|---|
User | Select the user to add to the group from the list retrieved from the database |
Effective from |
|
Effective to |
|
Select if you want the member to receive all group email correspondence | |
Viewer only | Select for this member to have view-only access to tickets; use for members who analyze data but do not handle ticket resolution |
Manager | Select if this member is a manager of the group; the manager designation can be used in escalation rules |
Support level | Adjust if this member's support level is different from the default defined at the user level |
Assignment limit | Specify who can assign tickets to this member:
|
Global coverage | Only available to groups with Sites Limit enabled: Select if this member provides support beyond their local site; useful for tracking coverage in global organizations |
Sites coverage | Only available to groups with Sites Limit enabled: Specify which sites this member covers |
Only available to groups with Auto Assign enabled: enter the priority of this group member relative to other group members |
Select Save.
Disabling a group member
You can disable an existing group member at any time.
A disabled group member can be reactivated at any time.
To disable a group member:
In the row corresponding to your group, click on the entry in the Members cell.
(The entry is an integer corresponding to the current number of members in this group or the word (null) if the group is currently empty.)

In the Group Members dialog that appears, scroll down to the line corresponding to the user you want to disable and enter today's date into the Effective To column.

Select Save.
Customizing a group's status codes
Each ticket has a set of status codes available to it, based on its ticket type. The administrators can choose to make additional status codes available to a specific group.
For example, if a group in your organization is responsible for installations, the administrators can make the additional status code Pending Installation available to this group, even though this status code is not part of the ticket type's status codes.
To customize a group's status codes:
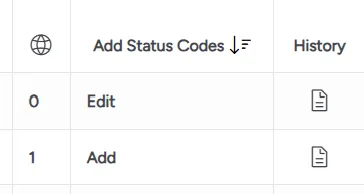
In the row corresponding to your group, click on the cell in the Add Status Codes column.
(The cell contains the word Add if this group's status codes are default or Edit if the group's status codes are already customized.)
In the Group Statuses dialog that appears, the Not Selected textbox lists the additional statuses not currently available to this group, and the Selected textbox lists additional statuses currently available to this group.
Select the additional status codes you want to make available to this group in the Not Selected textbox. Use the Ctrl key to select multiple statuses.
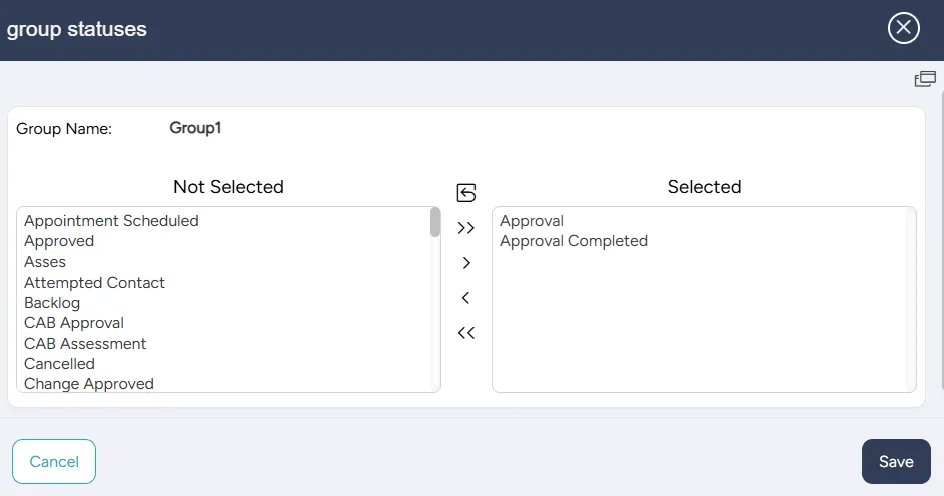
Use the arrows between the textboxes to move status codes from Not Selected to Selected.
Symbol | Functionality |
|---|---|
 | Reset to previous values |
 | Move all the statuses in the Not Selected box to the Selected box |
 | Move the highlighted statuses from the Not Selected box to the Selected box |
 | Move the highlighted statuses from the Selected box to the Not Selected box |
 | Move all the statuses in the Selected box to the Not Selected box |
Make sure the Selected textbox contains the status codes you want this group to access in addition to the status codes avilable in the ticket type, and select Save.
Prioritizing automatic ticket assignment
ITCC enables automatic ticket assignment to group members, in order of priority defined by the administrators.
Member priorities can be set up when the Auto Assign box for the group is selected, as in the following figure:

To set up member priorities within a group:
In the row corresponding to your group, click on the entry in the Members cell.
(The entry is a number corresponding to the current size of the group or the word (null) if the group is currently empty.)
In the Group Members dialog that appears, fill in the Auto Assign Priority field, setting the member of the highest priority to 1, the next highest priority to 2, and so on.
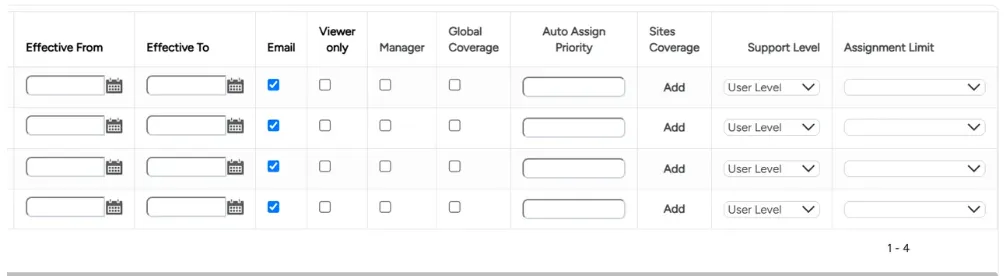
Select Save.
Making a group available to a ticket type
When you create a new group, it is automatically available for assigning tickets of the types that don't have any limits on the groups they can be assigned to.
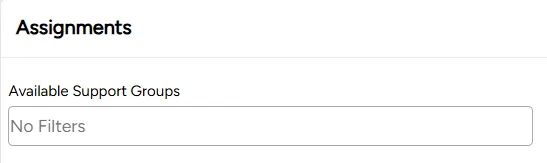
If a ticket type limits assignments to specific groups and you want to make the new group available for this ticket type, you need to add the new group to the list of groups available for this ticket type.
To make a group available to a ticket type:
On the left side menu, select Administration.
In the search bar under Search for Admin Configuration Options, enter Ticket Types and select the Ticket Types option that appears.
Search for or scroll down to the ticket type to which you want to add the group and select its Edit icon.
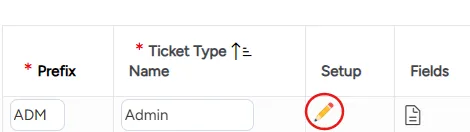
On the Setup Admin page that opens, on the menu on the right, select Assignments.
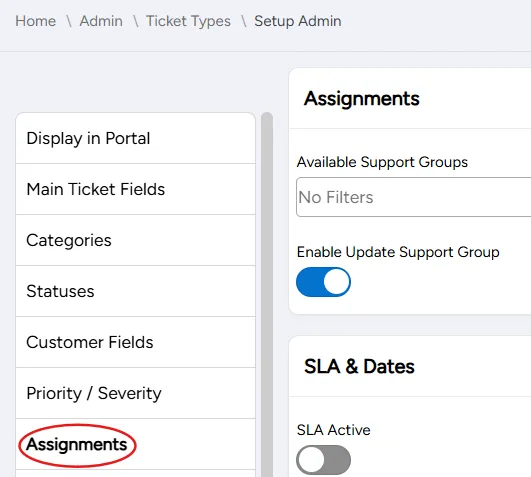
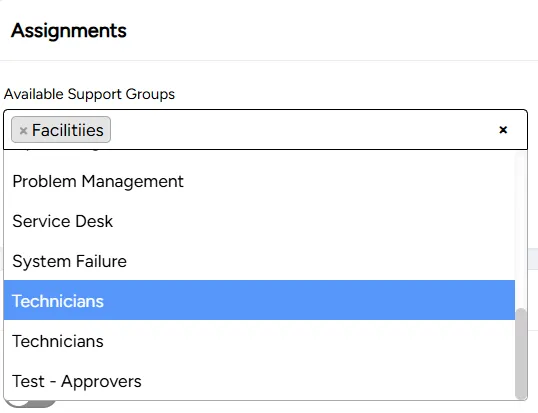
From the Available Support Groups dropdown list, select the group you want to add.
Select Save.