Action Item widget
This widget is only available to agents. It enables an agent to add action items to a ticket.
The action items can be defined in the form, so that they are visible when an agent opens a new ticket. The widget can also enable the action items to be defined case ad-hoc, where the agent can add action items during ticket processing. The widget also allows both form-defined and case ad-hoc action items.
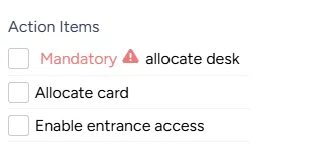
If you mark an action item as mandatory, the ticket cannot be closed until the action item is completed.
For example, when onboarding a new employee, a ticket with the Action Item widget can look like this:
Adding or editing an Action Item widget
You can add a new or edit an existing Action Item widget at any time.
To add or edit an Action Item widget:
In the list of widgets, turn on the toggle for the Action Item widget.
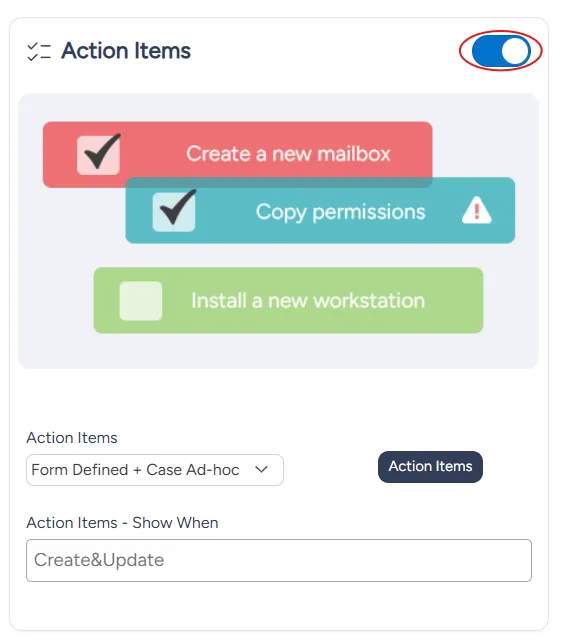
In the Action Items dropdown menu, choose if the action items are:
- Form defined: they appear on every new ticket based on this form
- Case ad-hoc: a new ticket does not contain any action items, but an agent can add action items at any stage of processing the ticket
- Both Form defined + Case ad-hoc: some action items appear on the ticket, and more action items can be added to the ticket by the agent processing the ticket
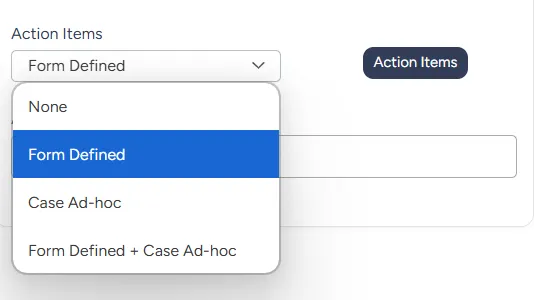
If you chose Form Defined or Form Defined + Case Ad-hoc option, enter action items as follows:
- Select the Action Items button. The Action Items dialog pops up.
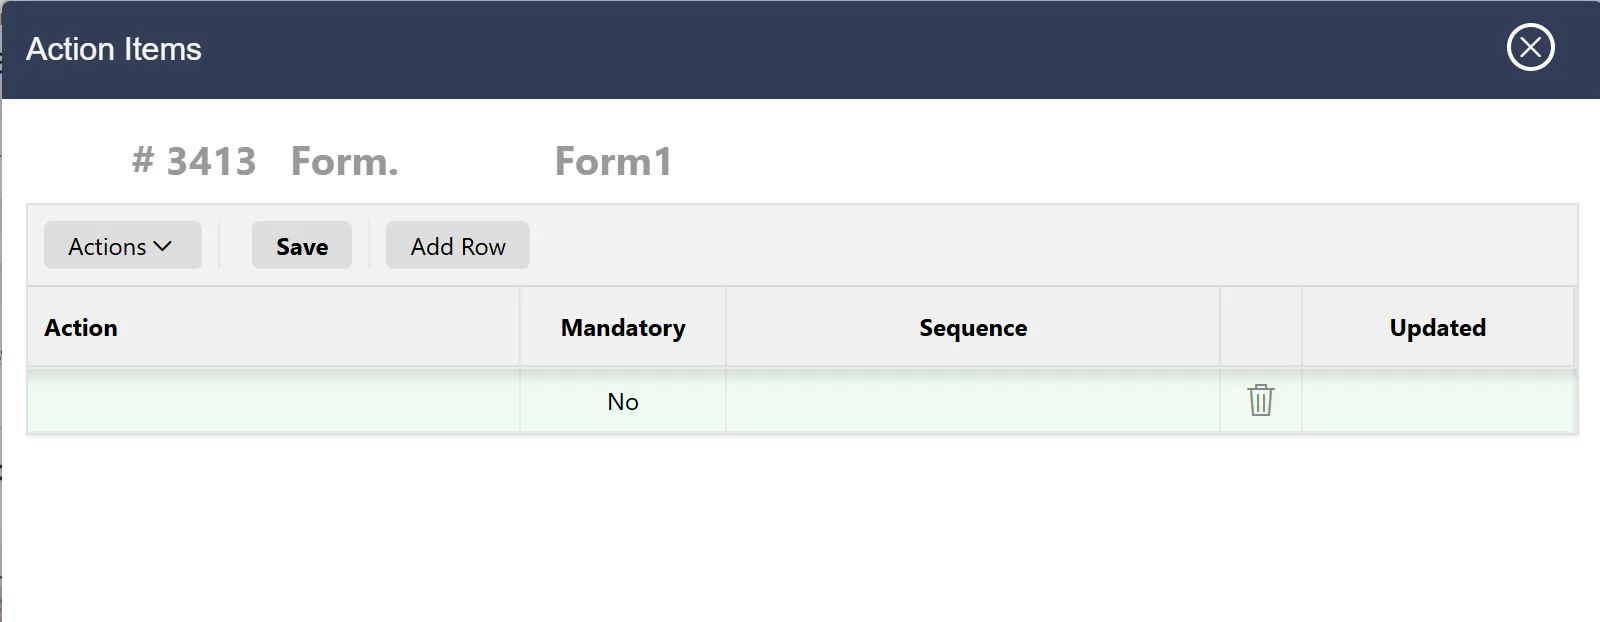
- In the Action Items dialog, on the first available line:
- In the Action column, enter the name of the action.
- In the Mandatory column, from the dropdown menu, choose whether this action is mandatory or not.
- In the Sequence column, enter this action's number in the sequence.
- To add more actions, select the Add Row button and fill in the information about the action. You can add as many actions as you need.
- To delete an action, select the trash bin icon in its row.
- From the Action Items - Show When dropdown menu, select if you want the action to show on:
- Create: the ticket creation page
- Update: when an agent opens an existing ticket
- Create&Update: both
At the bottom right of the page, select Save.